Managing TAGs and Segments of a list
WHAT IS IT ABOUT?What are TAGs?
The information you have about your contacts and their interests will be recorded in the Infomail email marketing platform as TAGs. Think of TAGS as labels to apply to your contacts to keep them organized. If you have worked with a CRM or even a blogging platform, you may have already used a tagging function to apply categories to clients or content. tagging function to apply categories to clients or content. In Infomail, TAGS are used to label and classify your contacts based on the information you have about them. Their purpose is to segment the mailing list, allowing you to organize your contacts to send messages to specific groups (the so-called Segments). SEGMENTING THE MAILING LIST: STEP BY STEPHow to use TAGs to segment a send
To use the segmentation features through TAGS, the first thing to do is to create a mailing list mailing list by entering all the data that we have deemed useful to collect about our contacts at the time of registration, and upload it to your Infomail account as a CSV file.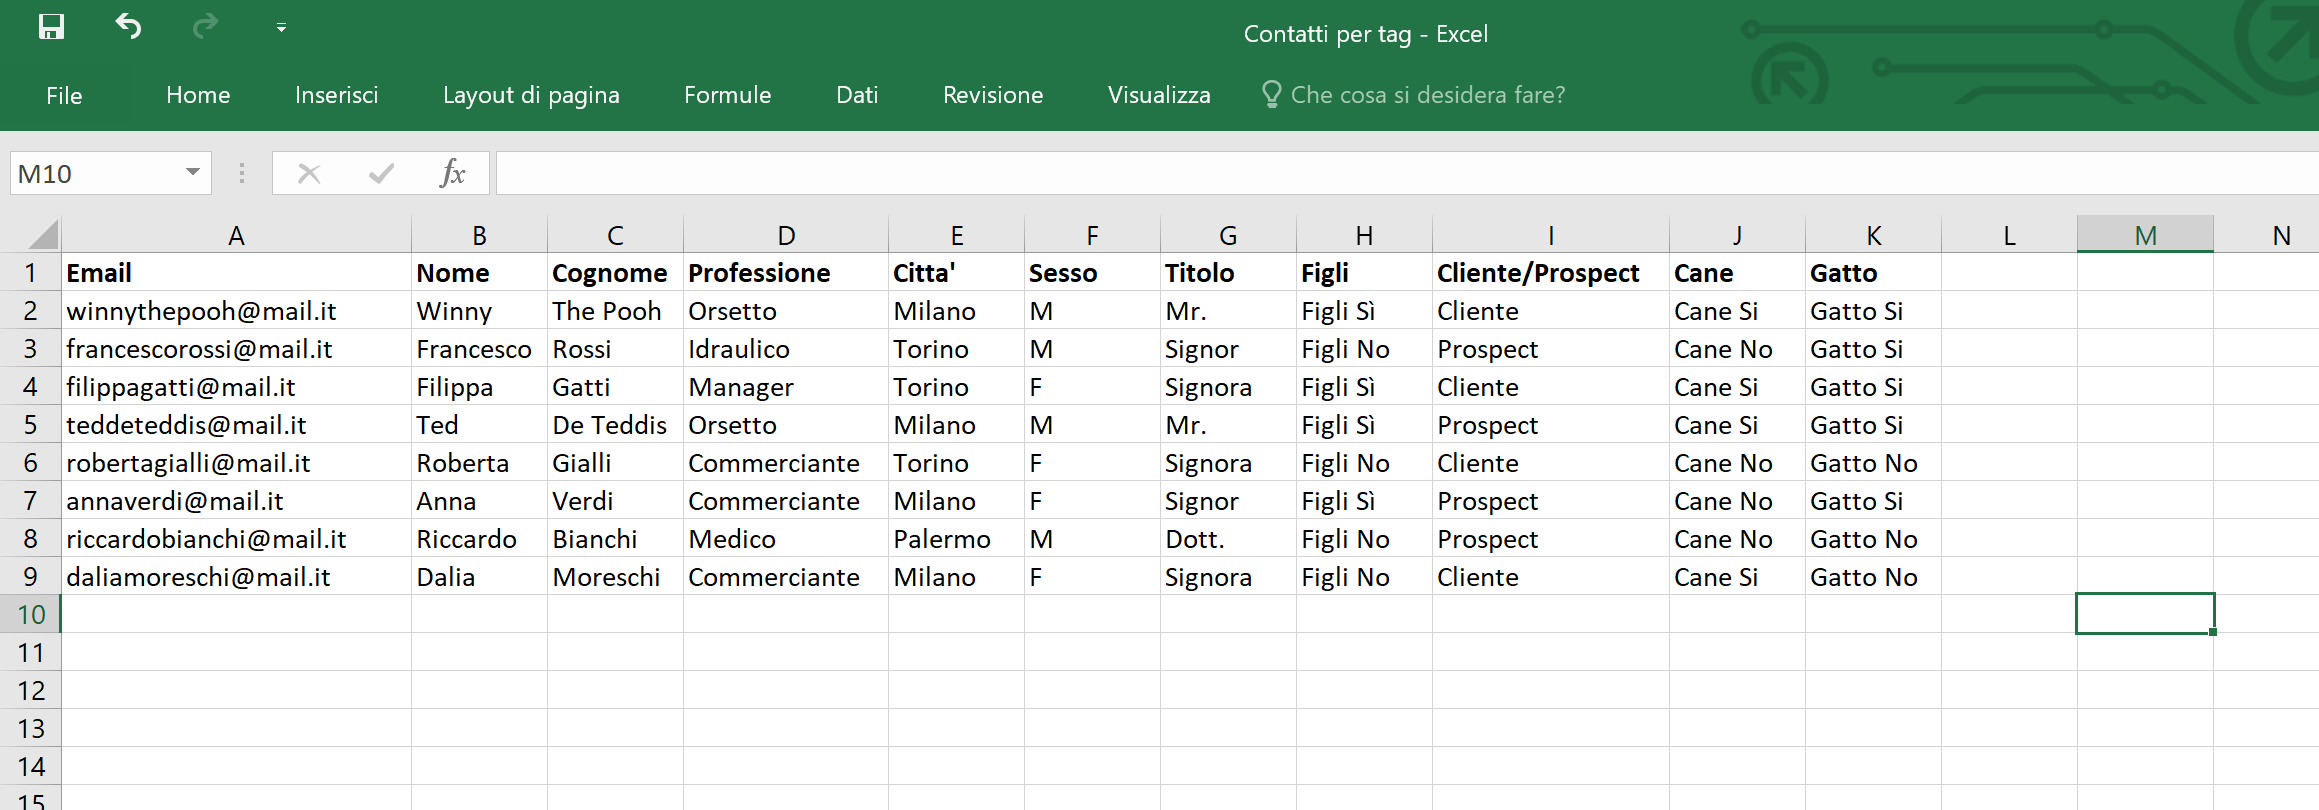
Loading the mailing list onto Infomail is easy:
- Go to the “Lists”, section, click on the “Create new list” button at the top right, and choose a name to assign to your new list.
- Once you’ve done this, click on the drop-down menu in the section for the new list indicated by three vertically arranged dots, and choose the “Import contacts” option “Importa contatti”.
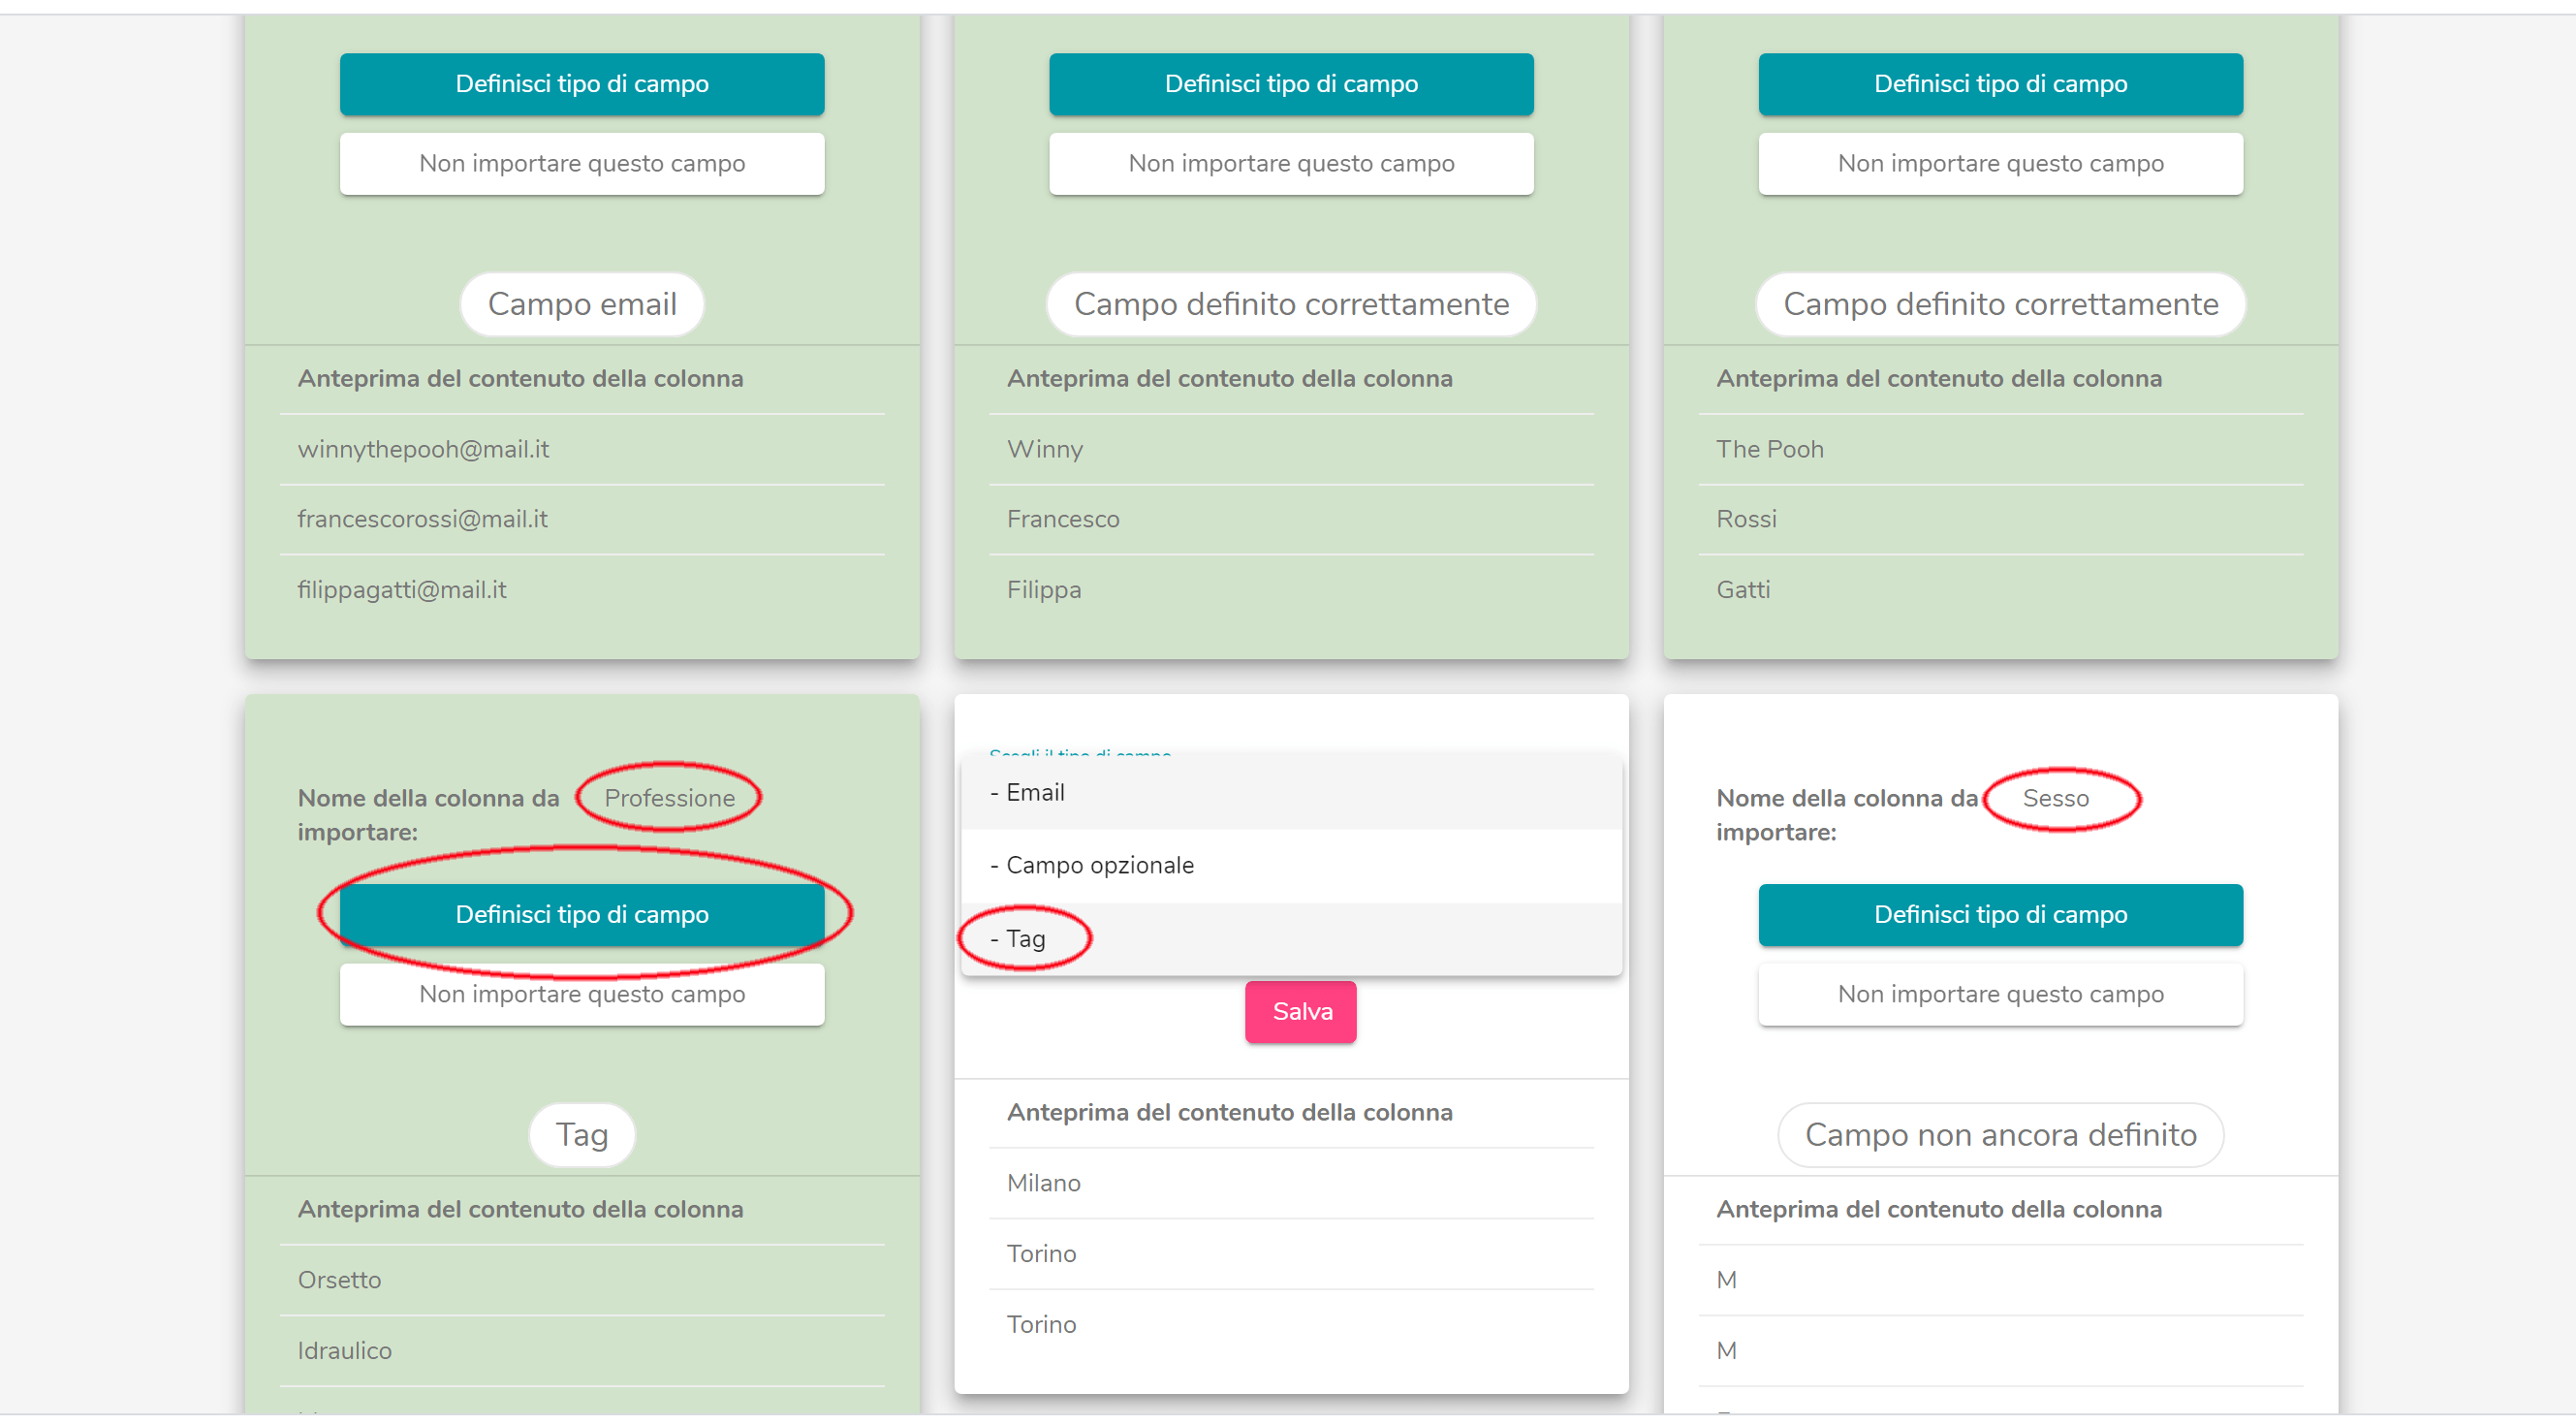
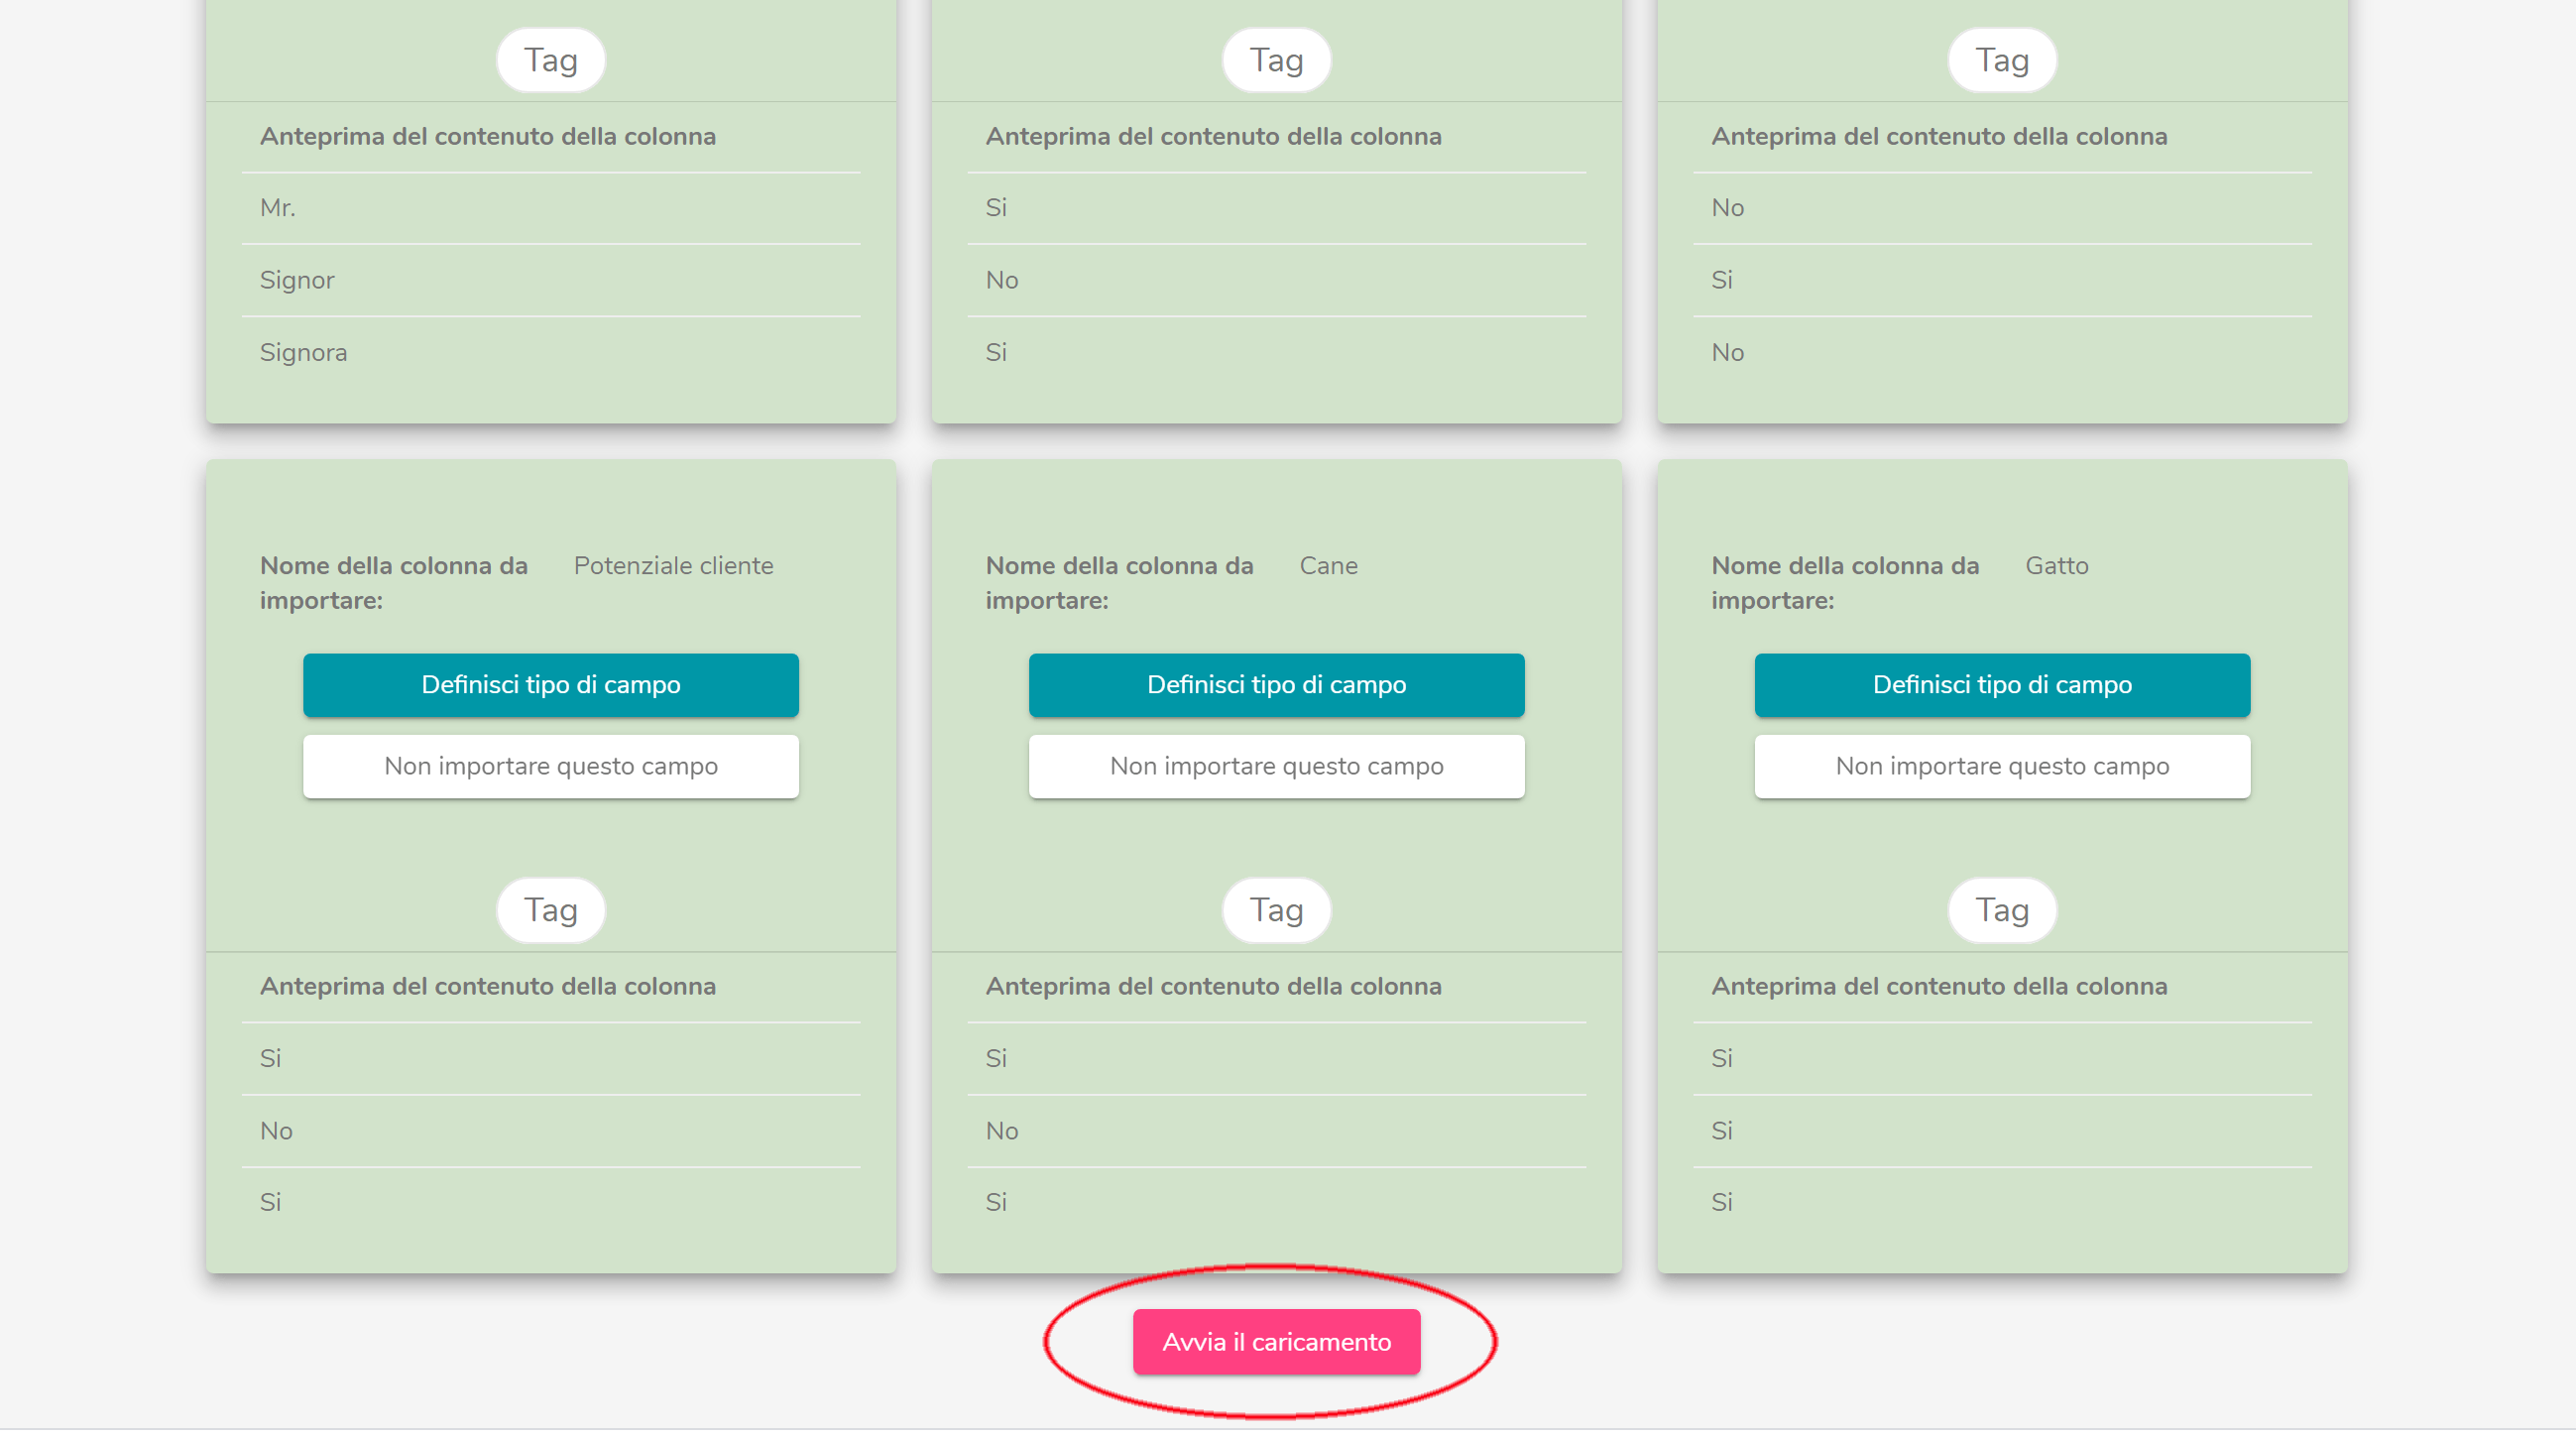
 The choice Email of Email should be assigned exclusively to the category that includes the user’s email address
The choice Campo opzionale of Optional Field will be assigned to the categories that elementi di personalizzazione you want to use as personalization elements of your communications, such as Name, Last Name, Title, etc.
The functionality of Optional Fields is what will allow you to automate the insertion of data such as the recipient’s name and surname in your emails or newsletters. More information about Optional Fields and Email/Newsletter Customization. here.
The choice of TAG , instead, will be assigned to label and classify your contacts based on the information you have about them. For example, if you have provided the gender category (male or female) in the imported Excel sheet, you can register it as a TAG, name it “gender” and, later, use this TAG to send only to male or female contacts.
The choice Email of Email should be assigned exclusively to the category that includes the user’s email address
The choice Campo opzionale of Optional Field will be assigned to the categories that elementi di personalizzazione you want to use as personalization elements of your communications, such as Name, Last Name, Title, etc.
The functionality of Optional Fields is what will allow you to automate the insertion of data such as the recipient’s name and surname in your emails or newsletters. More information about Optional Fields and Email/Newsletter Customization. here.
The choice of TAG , instead, will be assigned to label and classify your contacts based on the information you have about them. For example, if you have provided the gender category (male or female) in the imported Excel sheet, you can register it as a TAG, name it “gender” and, later, use this TAG to send only to male or female contacts.
 Once you have created the new mailing list with Optional Fields and TAGs, you can proceed to send and segment it through TAGs.
Here’s how to proceed!
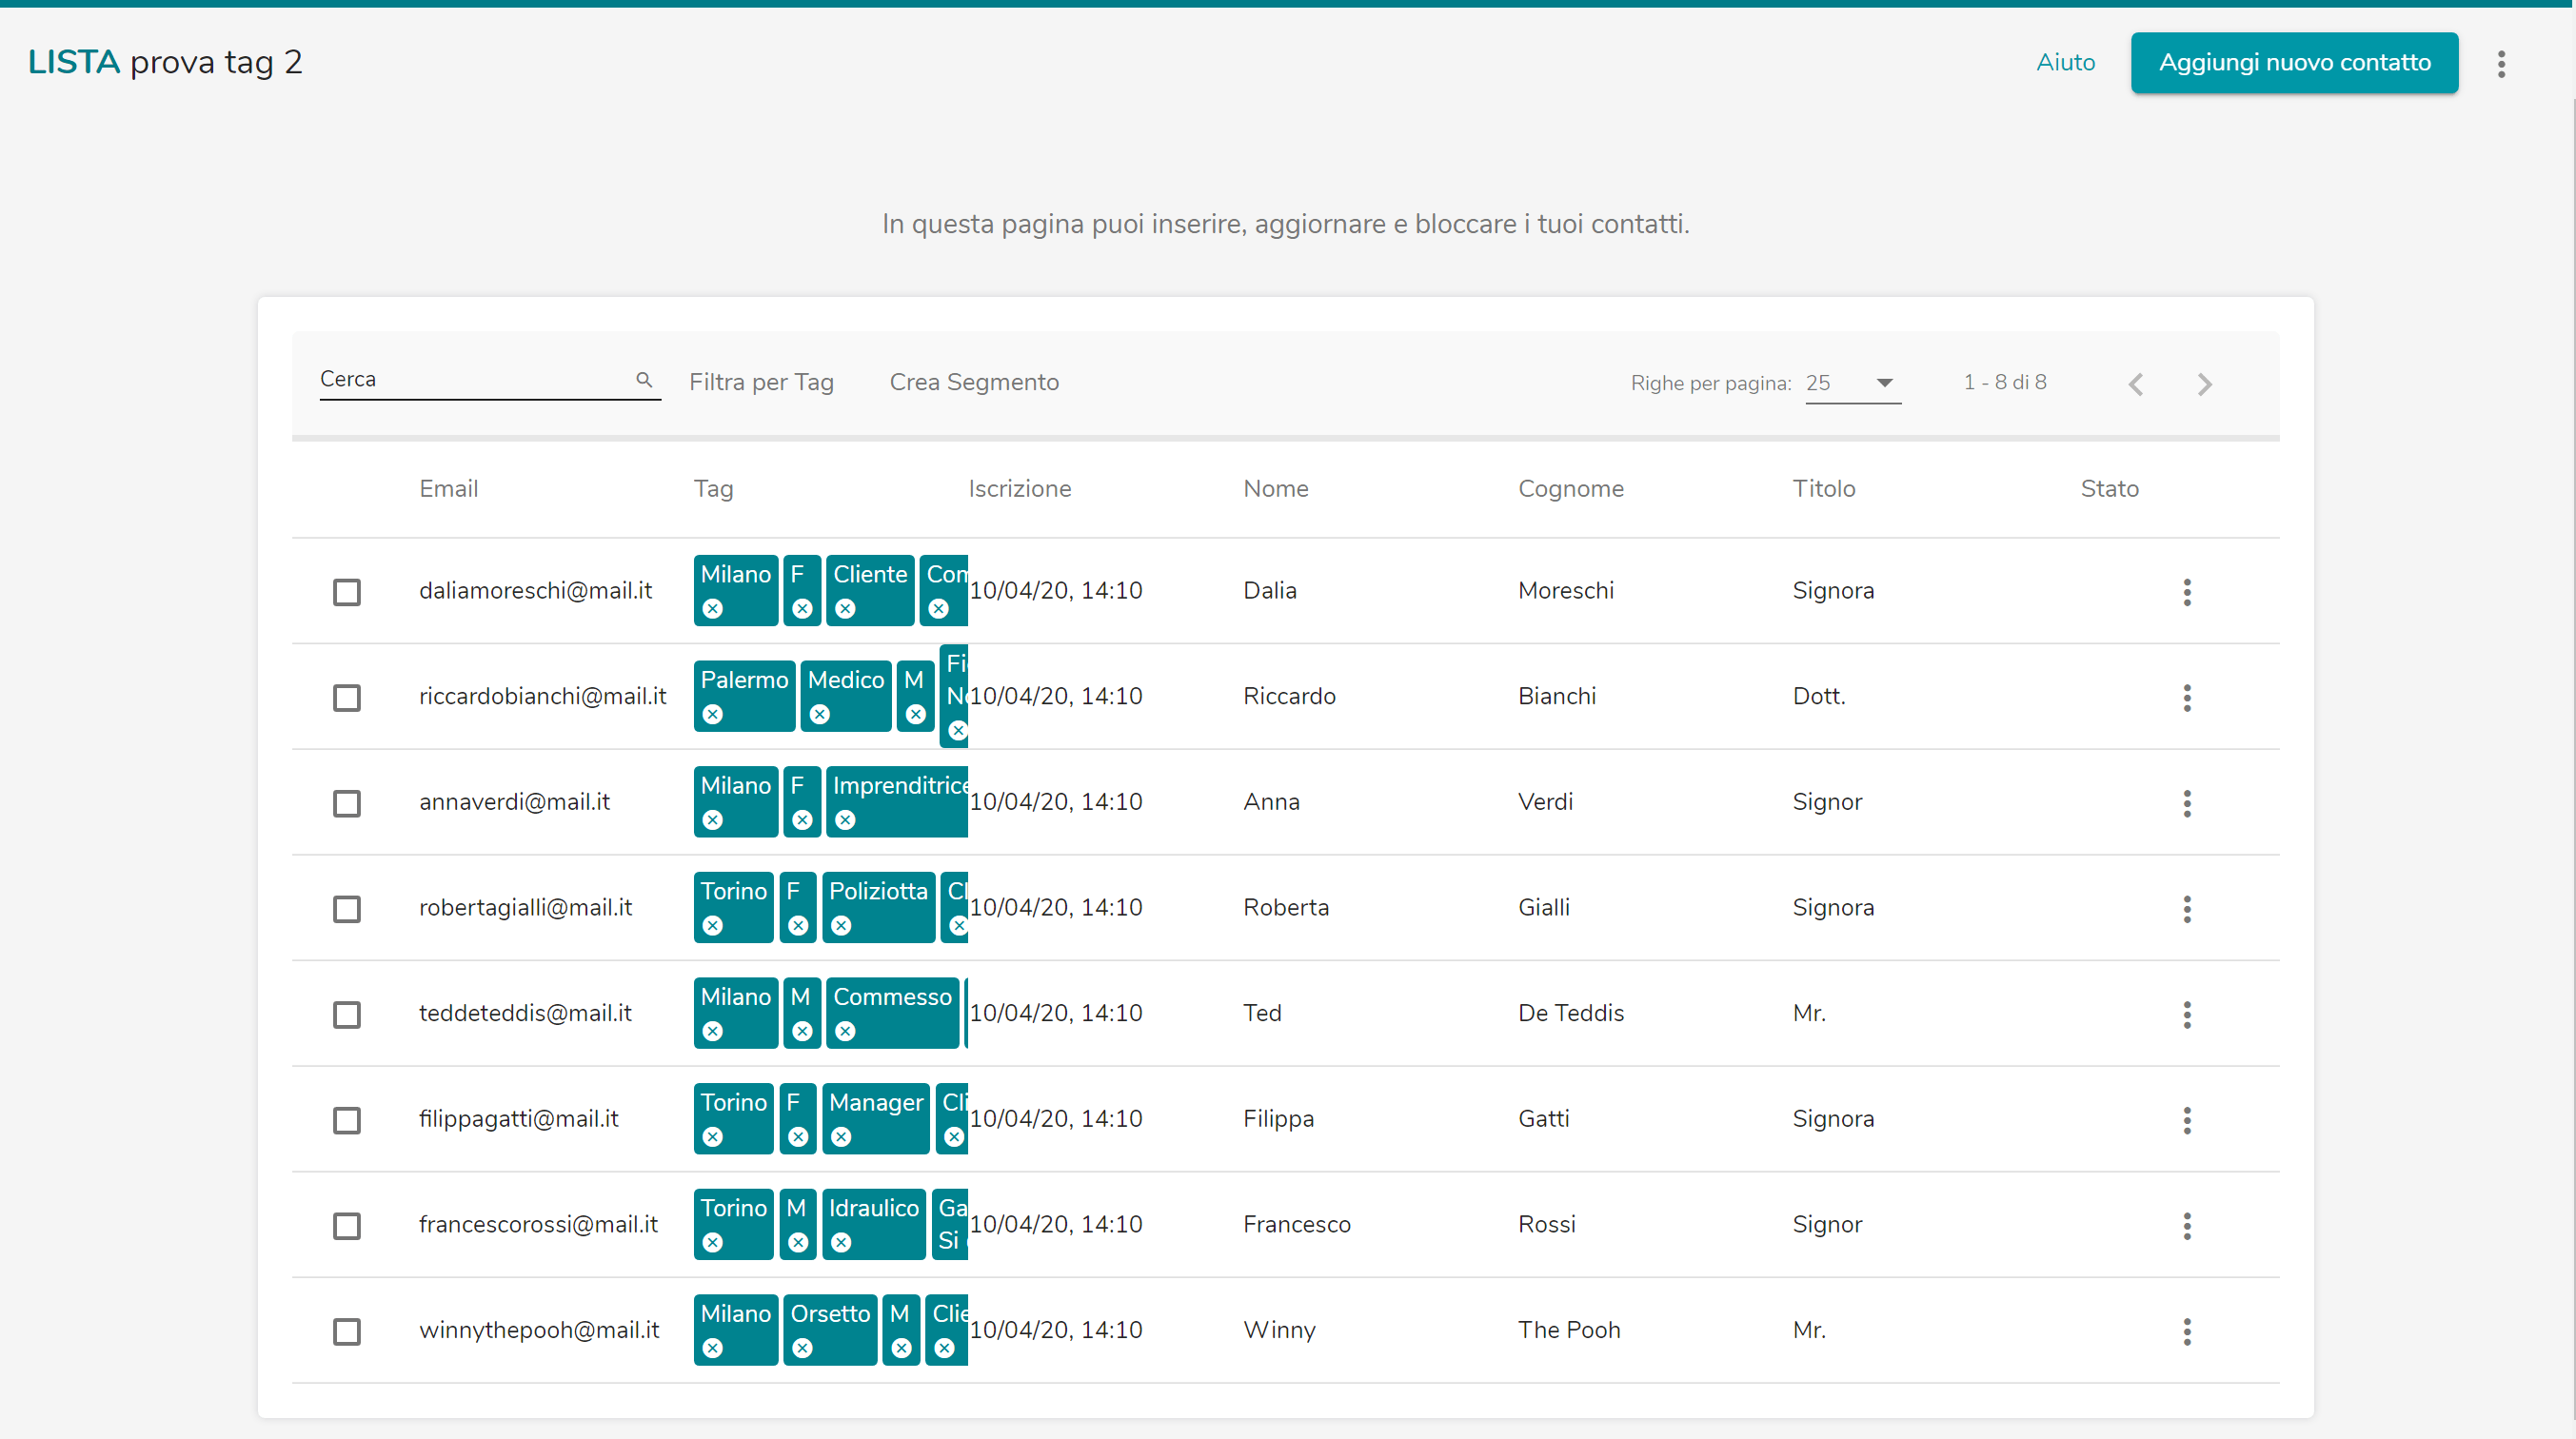
Go to the “Lists” page and click on the “”Edit list” button” corresponding to the mailing list you intend to use.
You will see your mailing list and each email address will correspond to the TAGs you have chosen to include (city, profession, gender, whether they have children, whether they have a dog or a cat, etc.).
Once you have created the new mailing list with Optional Fields and TAGs, you can proceed to send and segment it through TAGs.
Here’s how to proceed!
Go to the “Lists” page and click on the “”Edit list” button” corresponding to the mailing list you intend to use.
You will see your mailing list and each email address will correspond to the TAGs you have chosen to include (city, profession, gender, whether they have children, whether they have a dog or a cat, etc.).
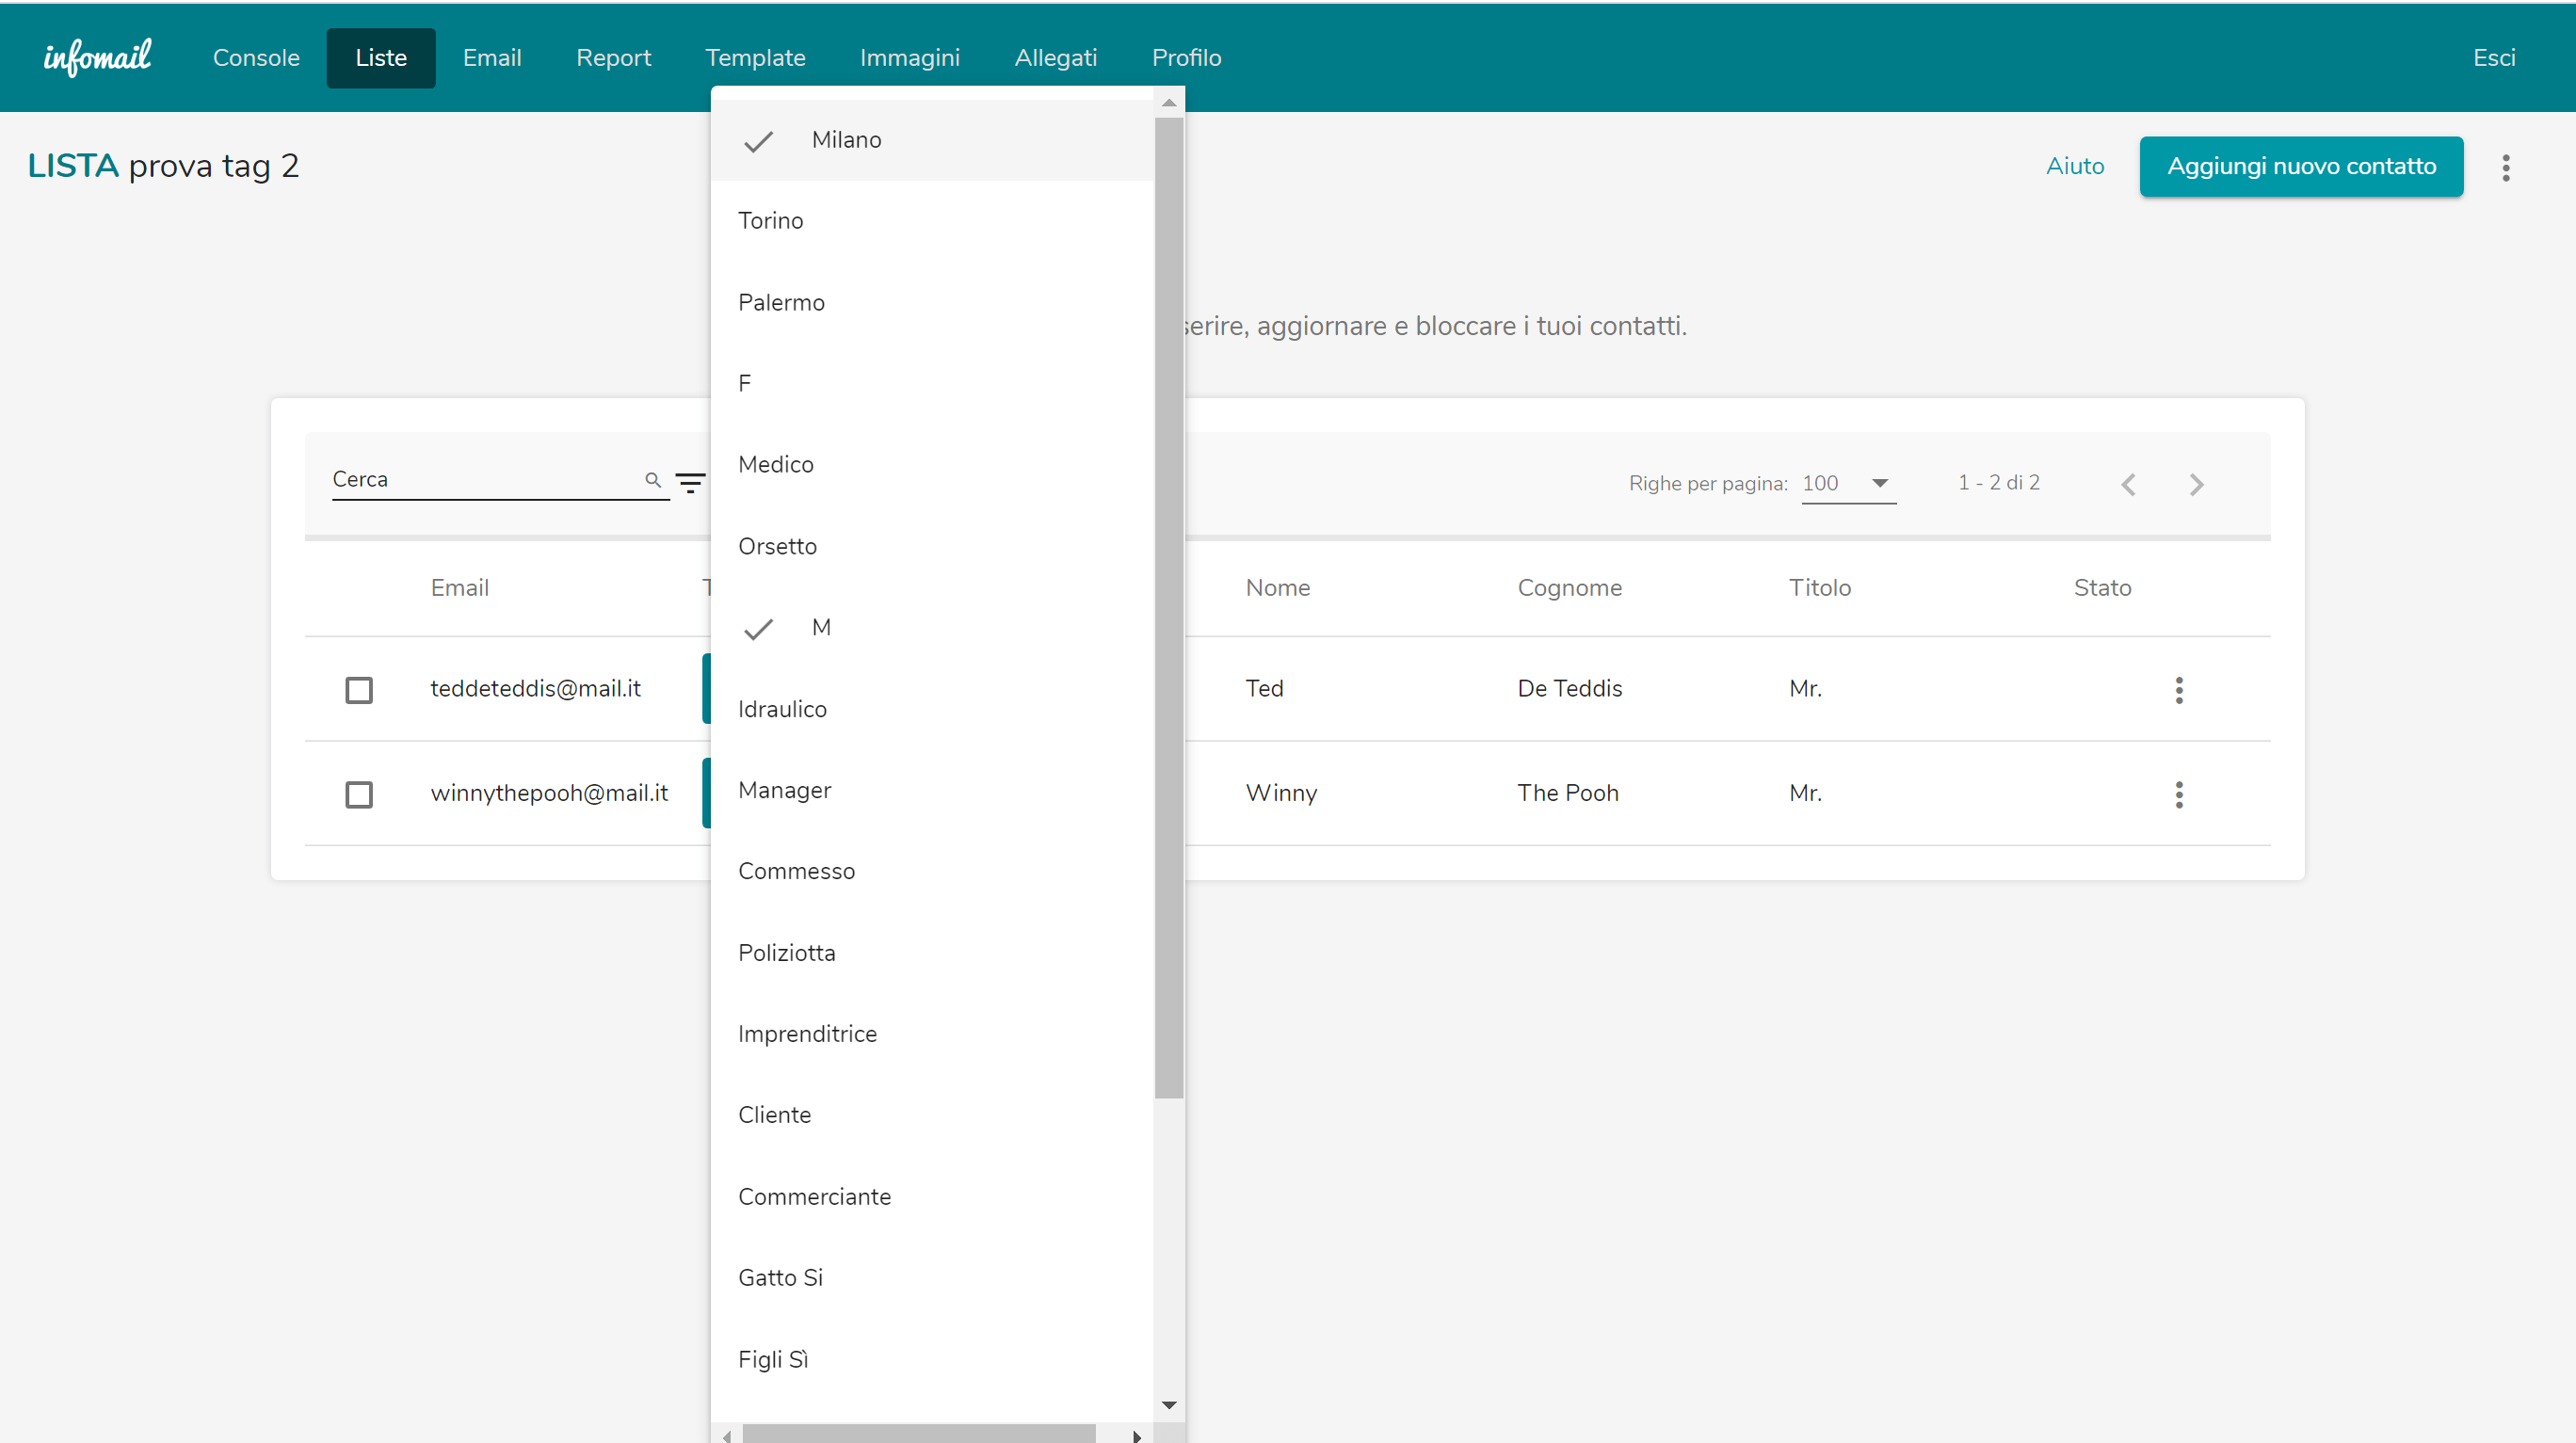
 By clicking on the “Filter by Tag” option, you can select and view the categories to which you want to send your email. In the attached example, we selected male contacts residing in Milan. The contacts with these requirements in our test list are 2: Ted De Teddis and Winny The Pooh. It’s just a few but good!
 NOW THAT WE HAVE TAGS, WHAT DO WE DO WITH THEM?
What are segments?
To segment the mailing list, the next step will be to send an email to the contacts we have selected through the tags. This is where Segments come into play. With tags, in fact, we have only defined the characteristics of our contacts and organized them into categories. In order to use this segmentation for specific sends, we need to… create Segments allow us to create a sub-list within our main contact list. Let’s see how to proceed!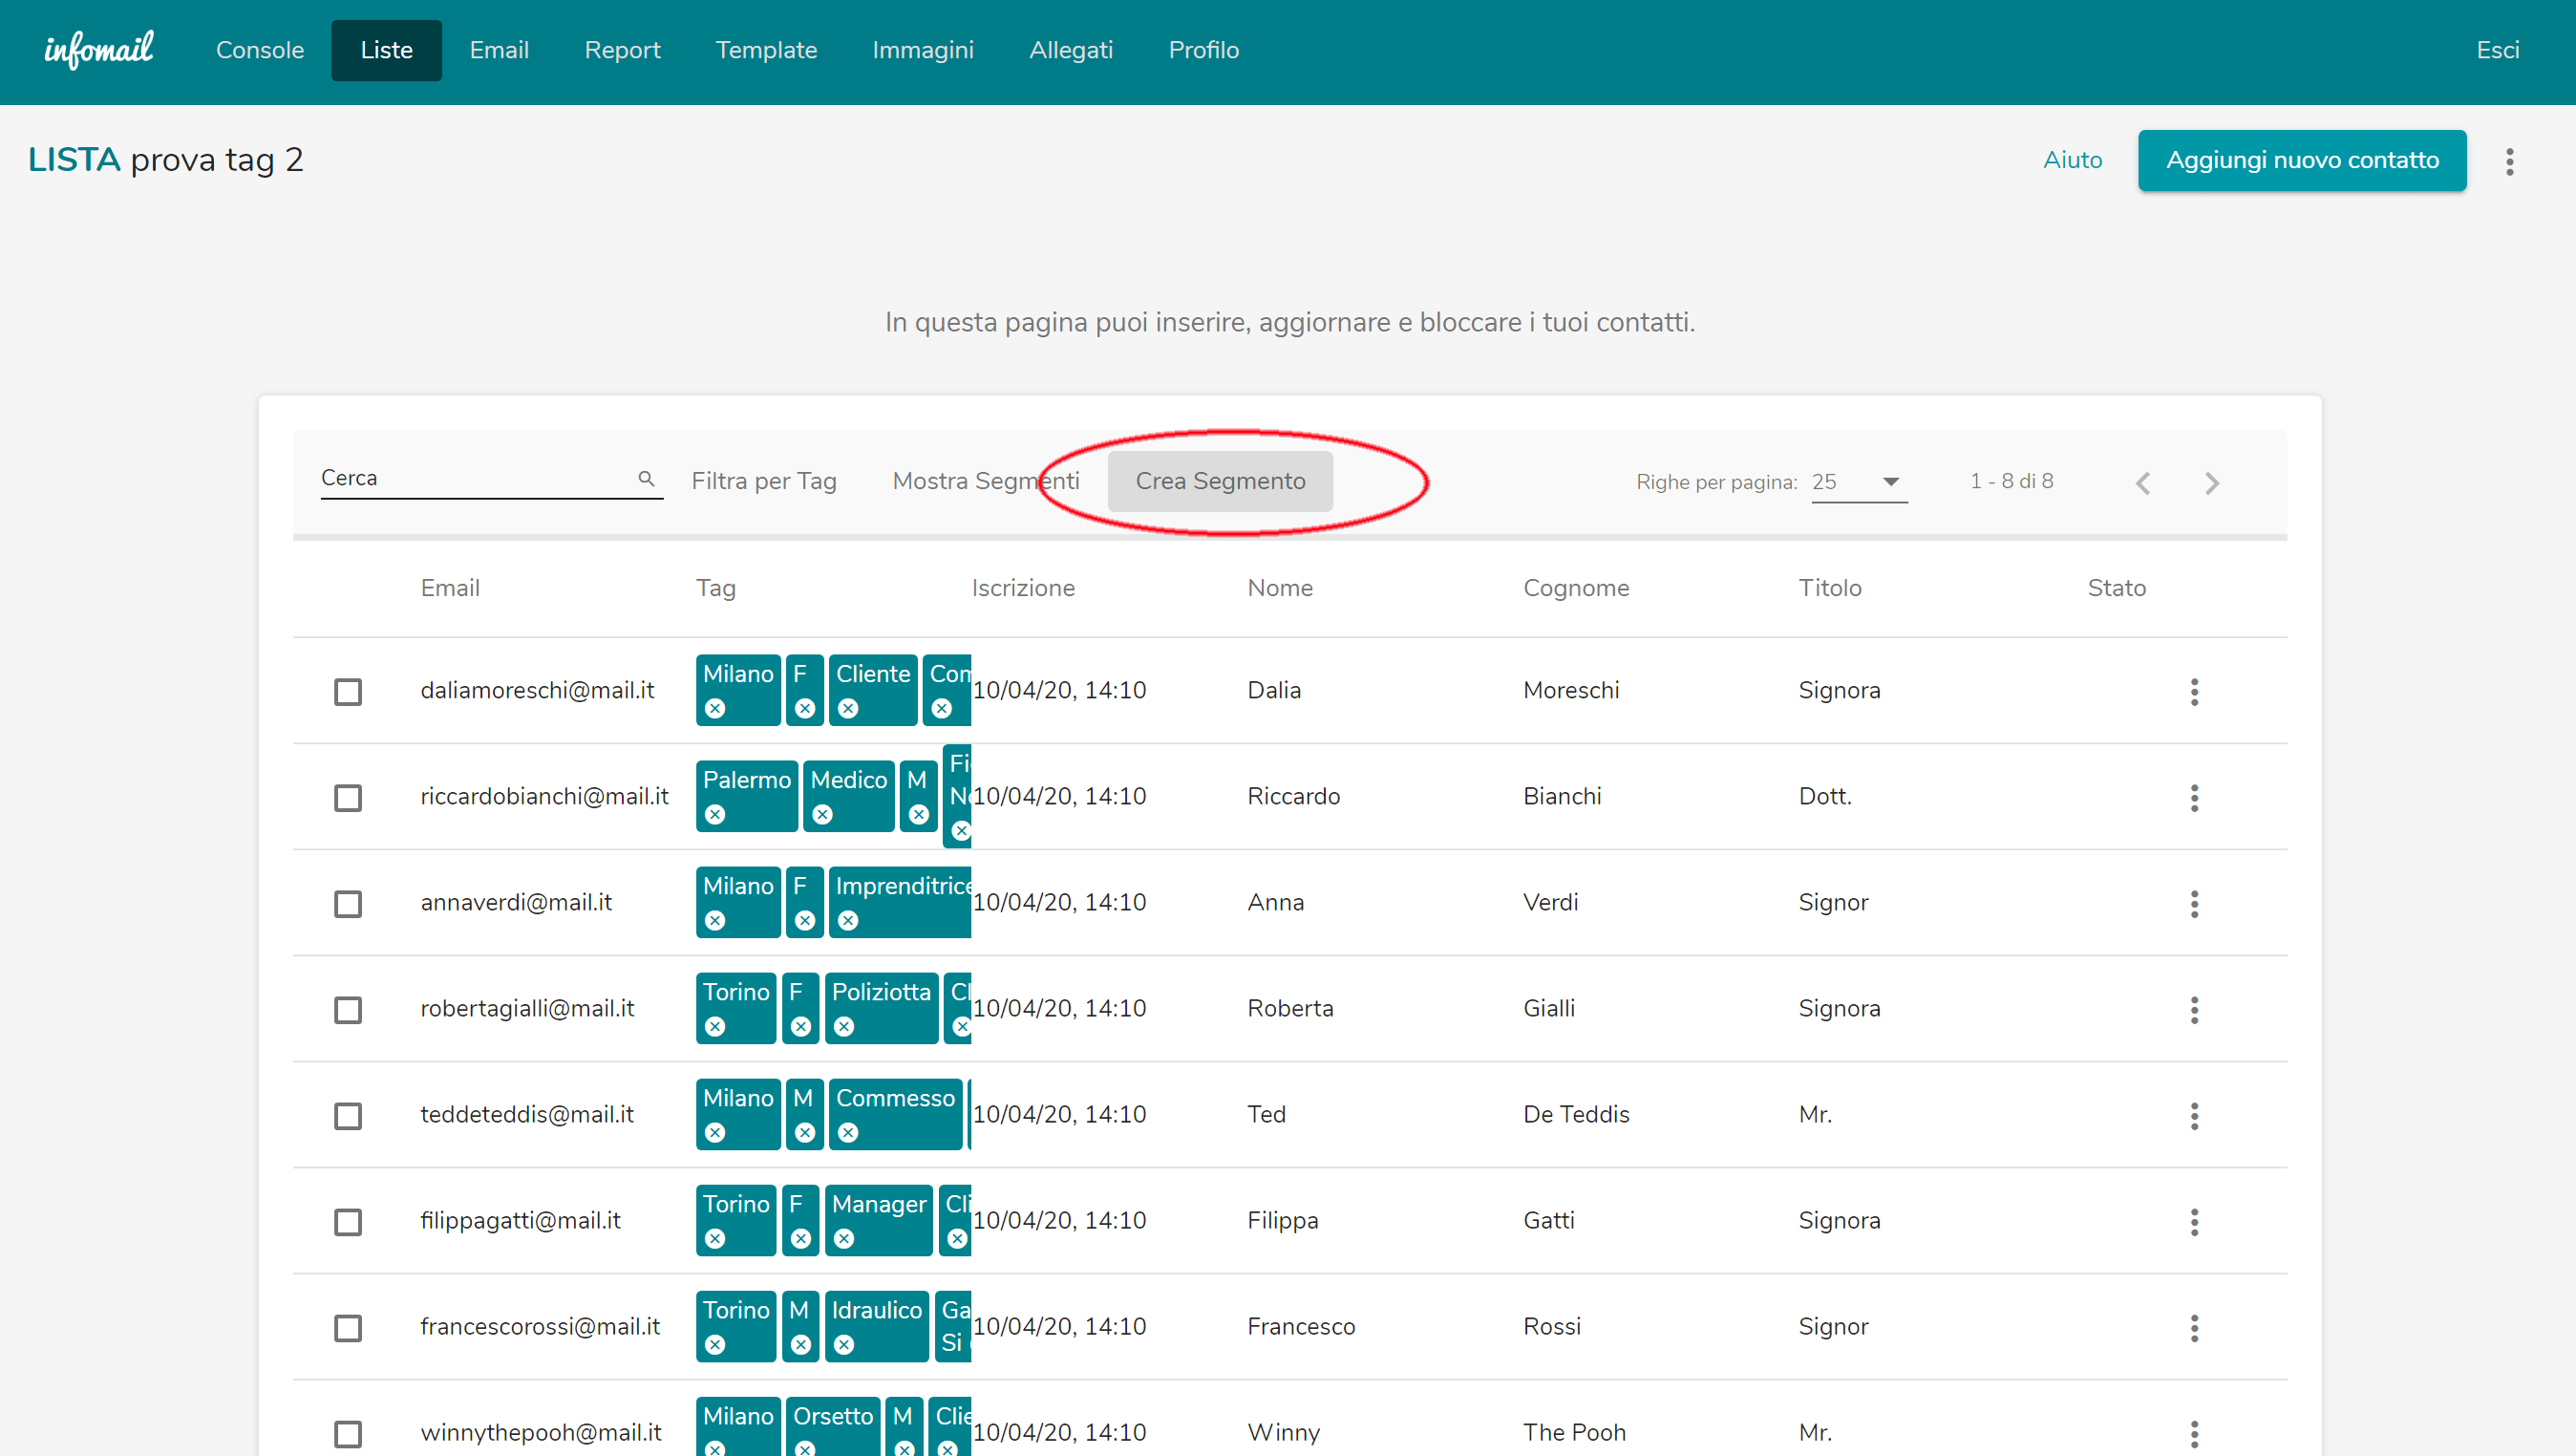
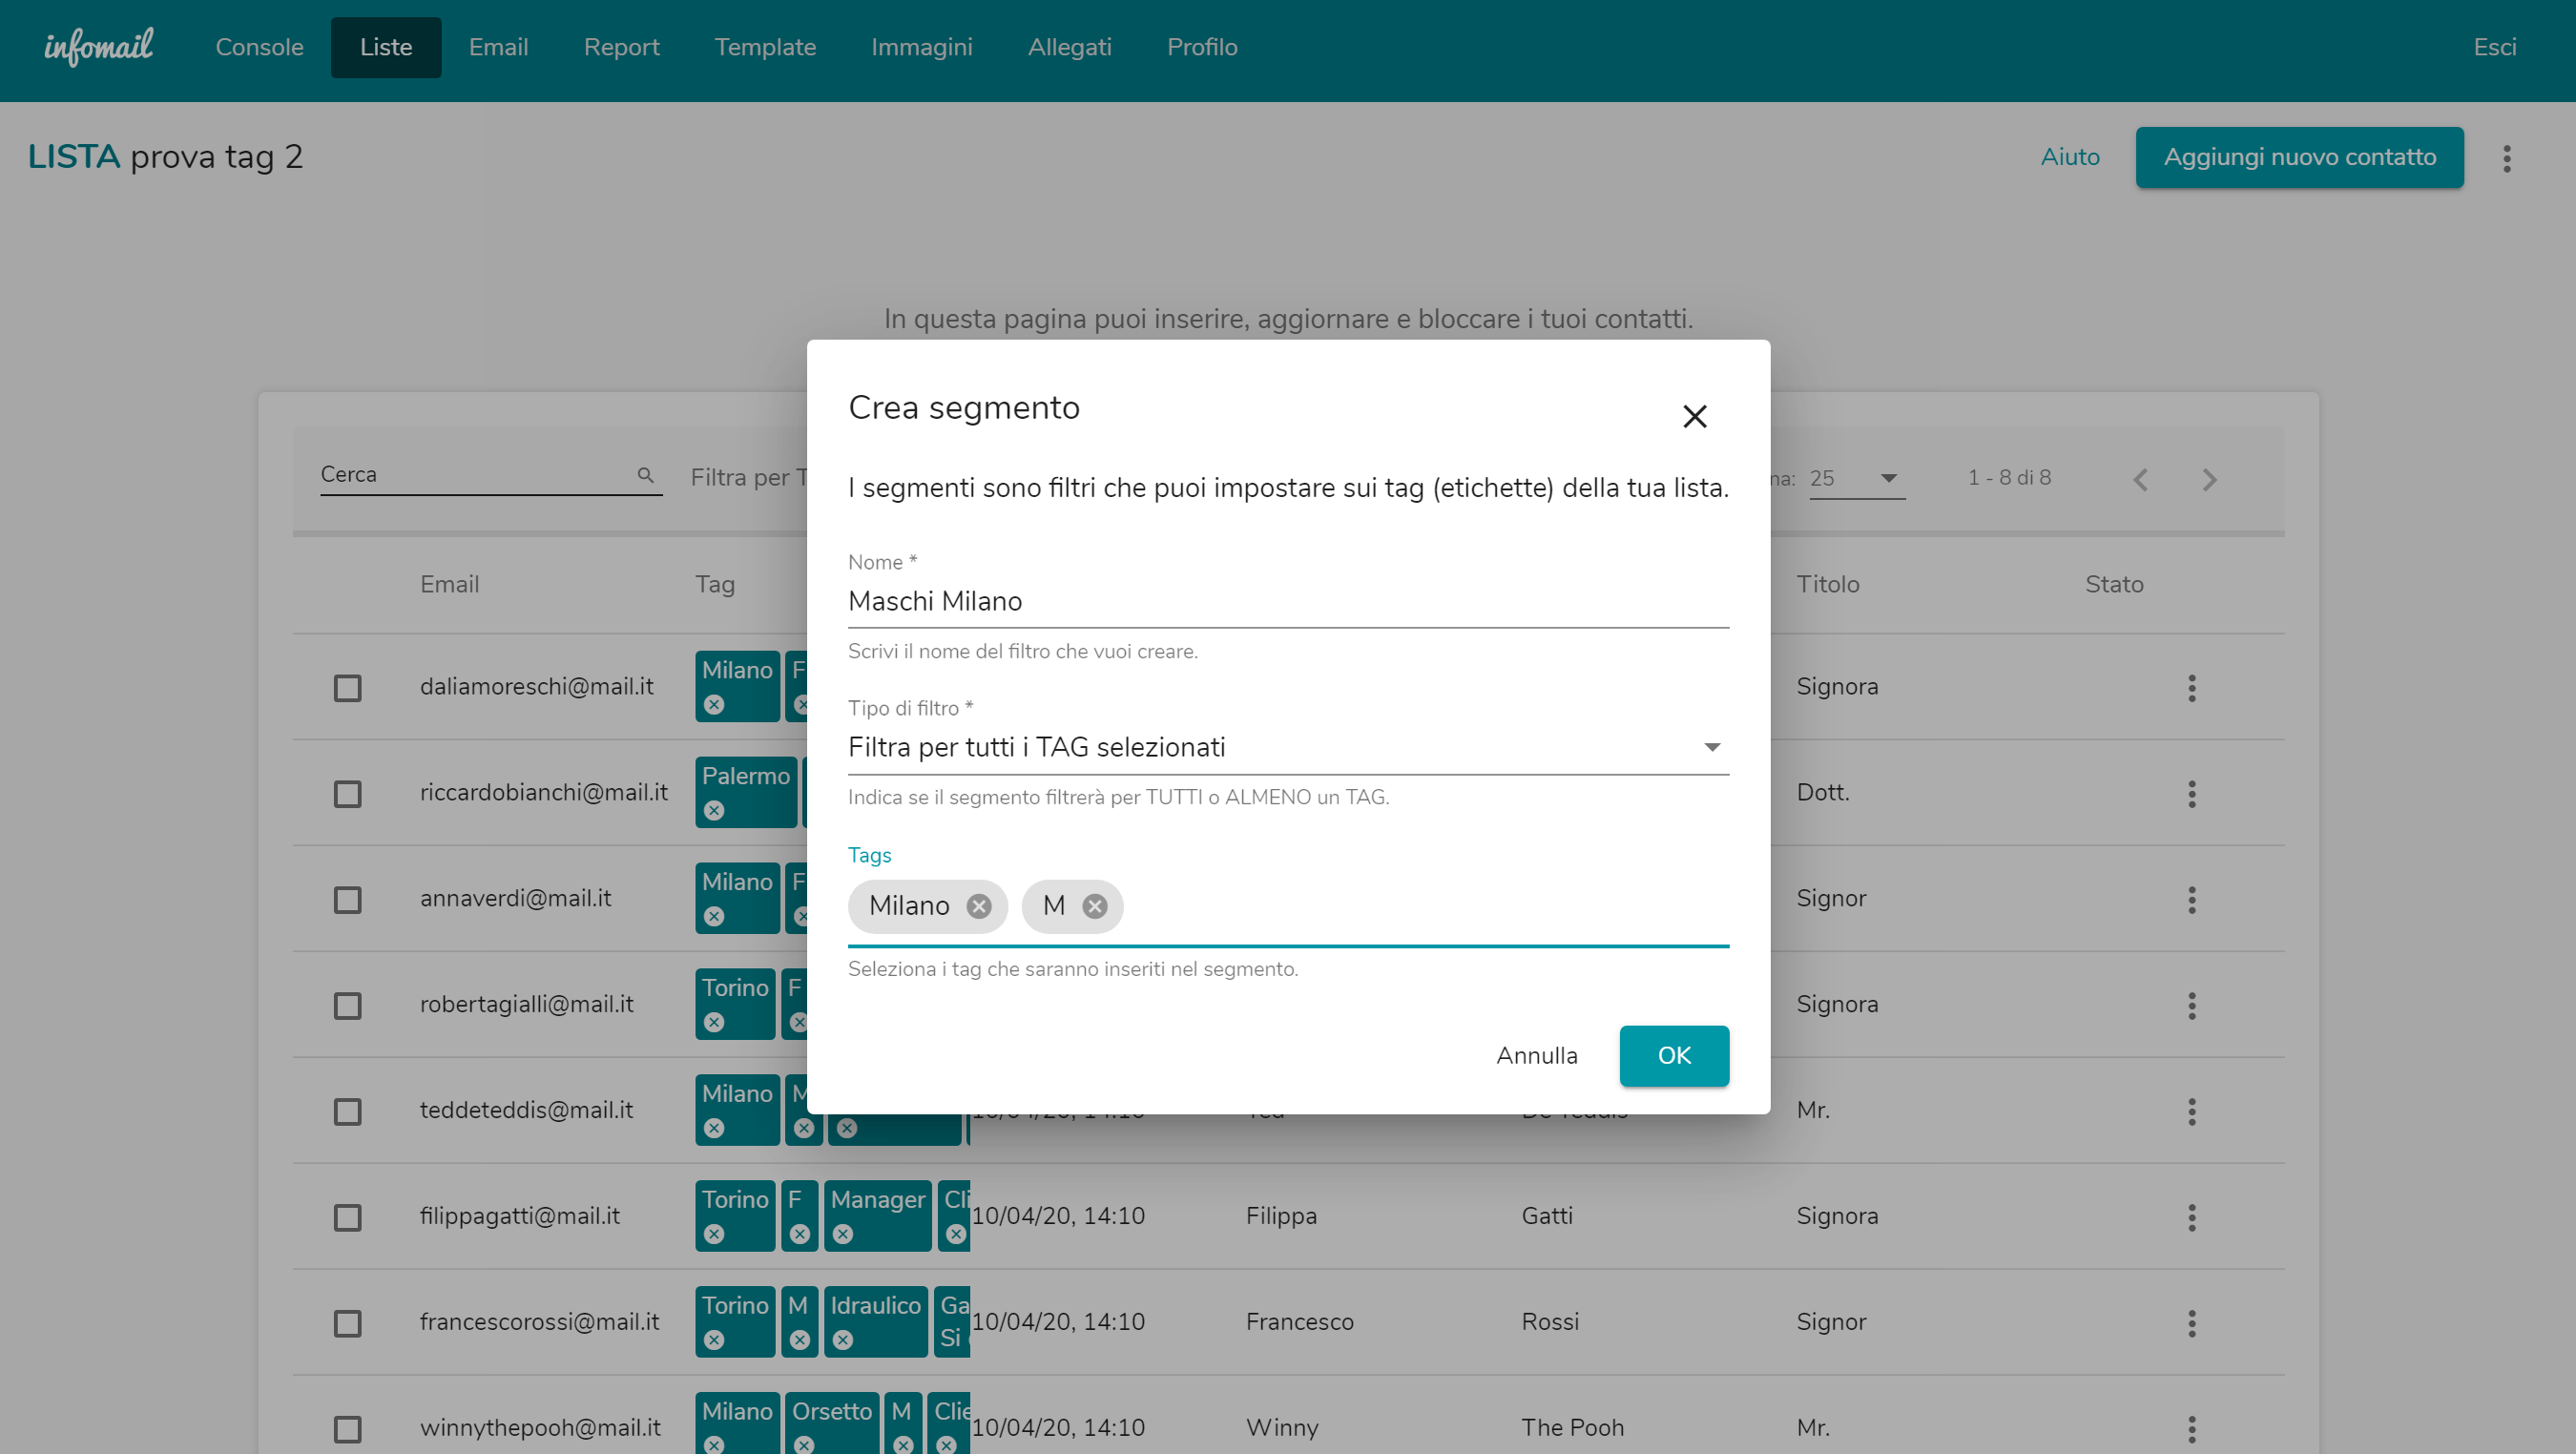 Again, on the “Edit List” screen, we need to click on “Create Segment”.
A dialog box will appear asking us to give a name to the Segment, define the type of filter (whether to filter by all selected TAGs o or at least one of them),and choose the TAGs related to the categories of contacts we want to select. We have selected contacts of male gender (M) residing in Milan.
Click OK and the segment has been created!
Again, on the “Edit List” screen, we need to click on “Create Segment”.
A dialog box will appear asking us to give a name to the Segment, define the type of filter (whether to filter by all selected TAGs o or at least one of them),and choose the TAGs related to the categories of contacts we want to select. We have selected contacts of male gender (M) residing in Milan.
Click OK and the segment has been created!
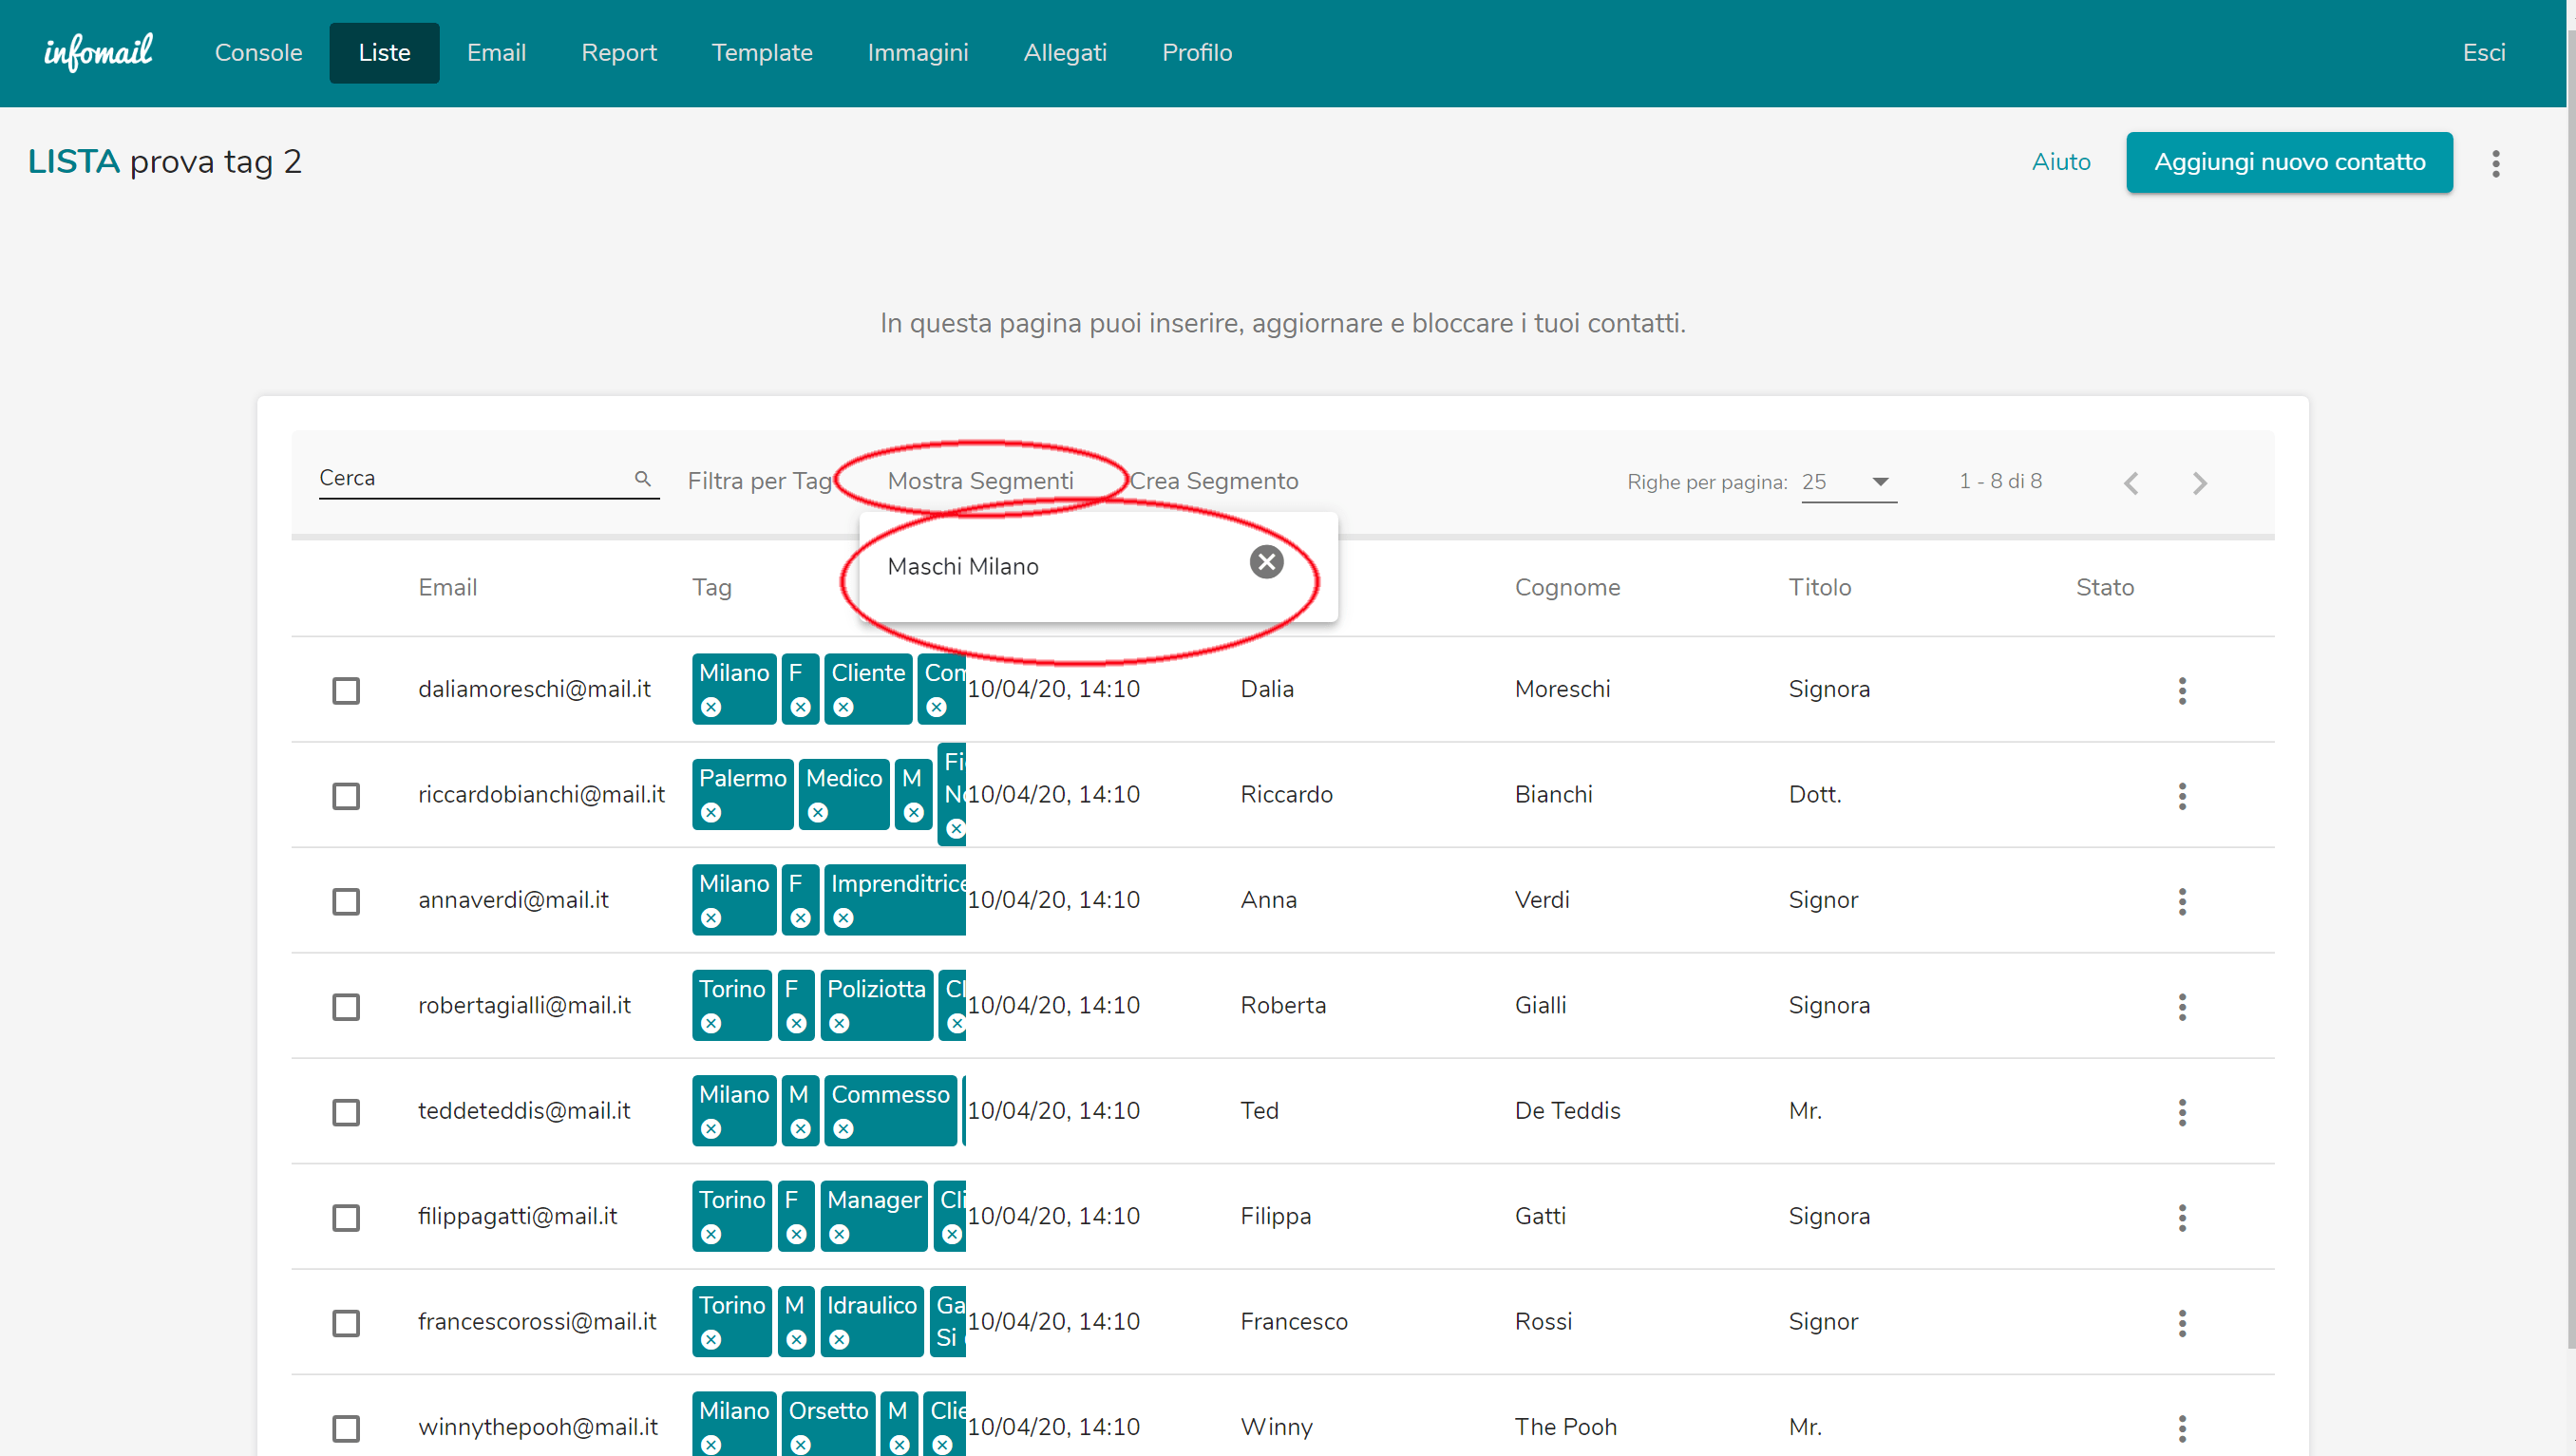 By clicking on “Show Segments” , you can view and manage all the segments you have created.
Now that we have set the tags and created the segment we are interested in, we can proceed to send the email to our male contacts residing in Milan.
Anche questo è semplicissimo!
By clicking on “Show Segments” , you can view and manage all the segments you have created.
Now that we have set the tags and created the segment we are interested in, we can proceed to send the email to our male contacts residing in Milan.
Anche questo è semplicissimo!
ALMOST DONE..
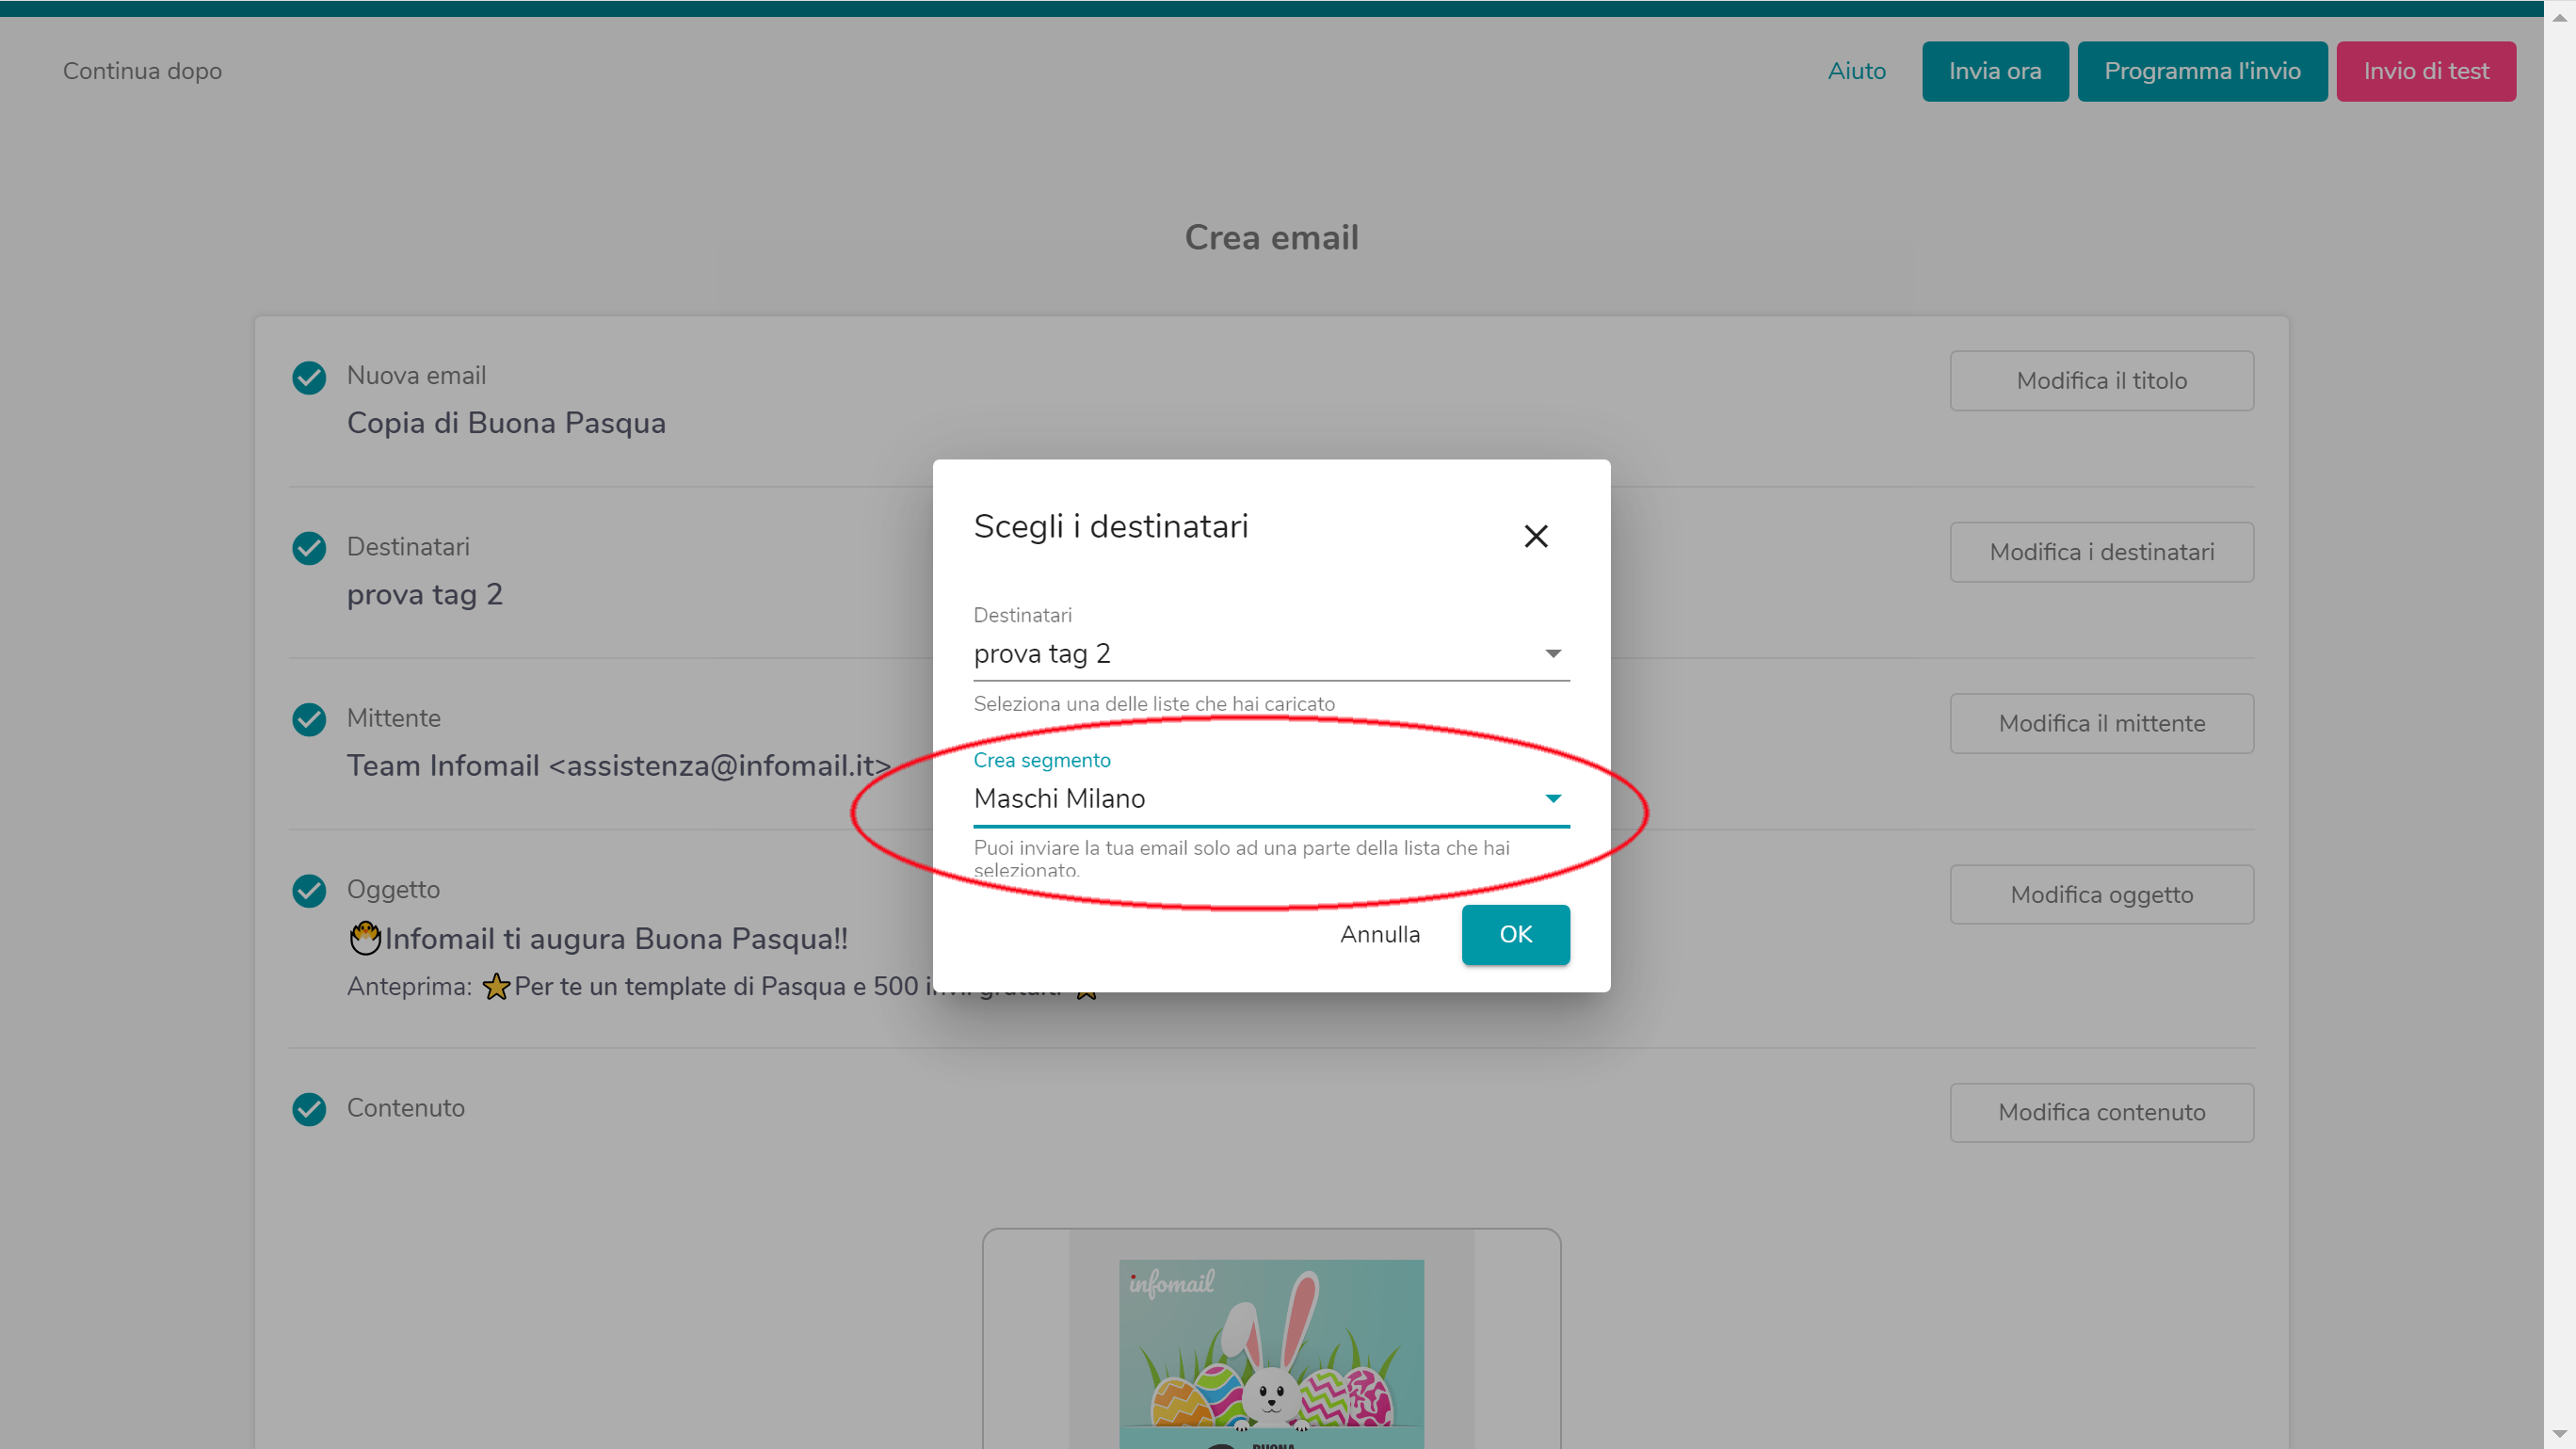
And now, sending it!
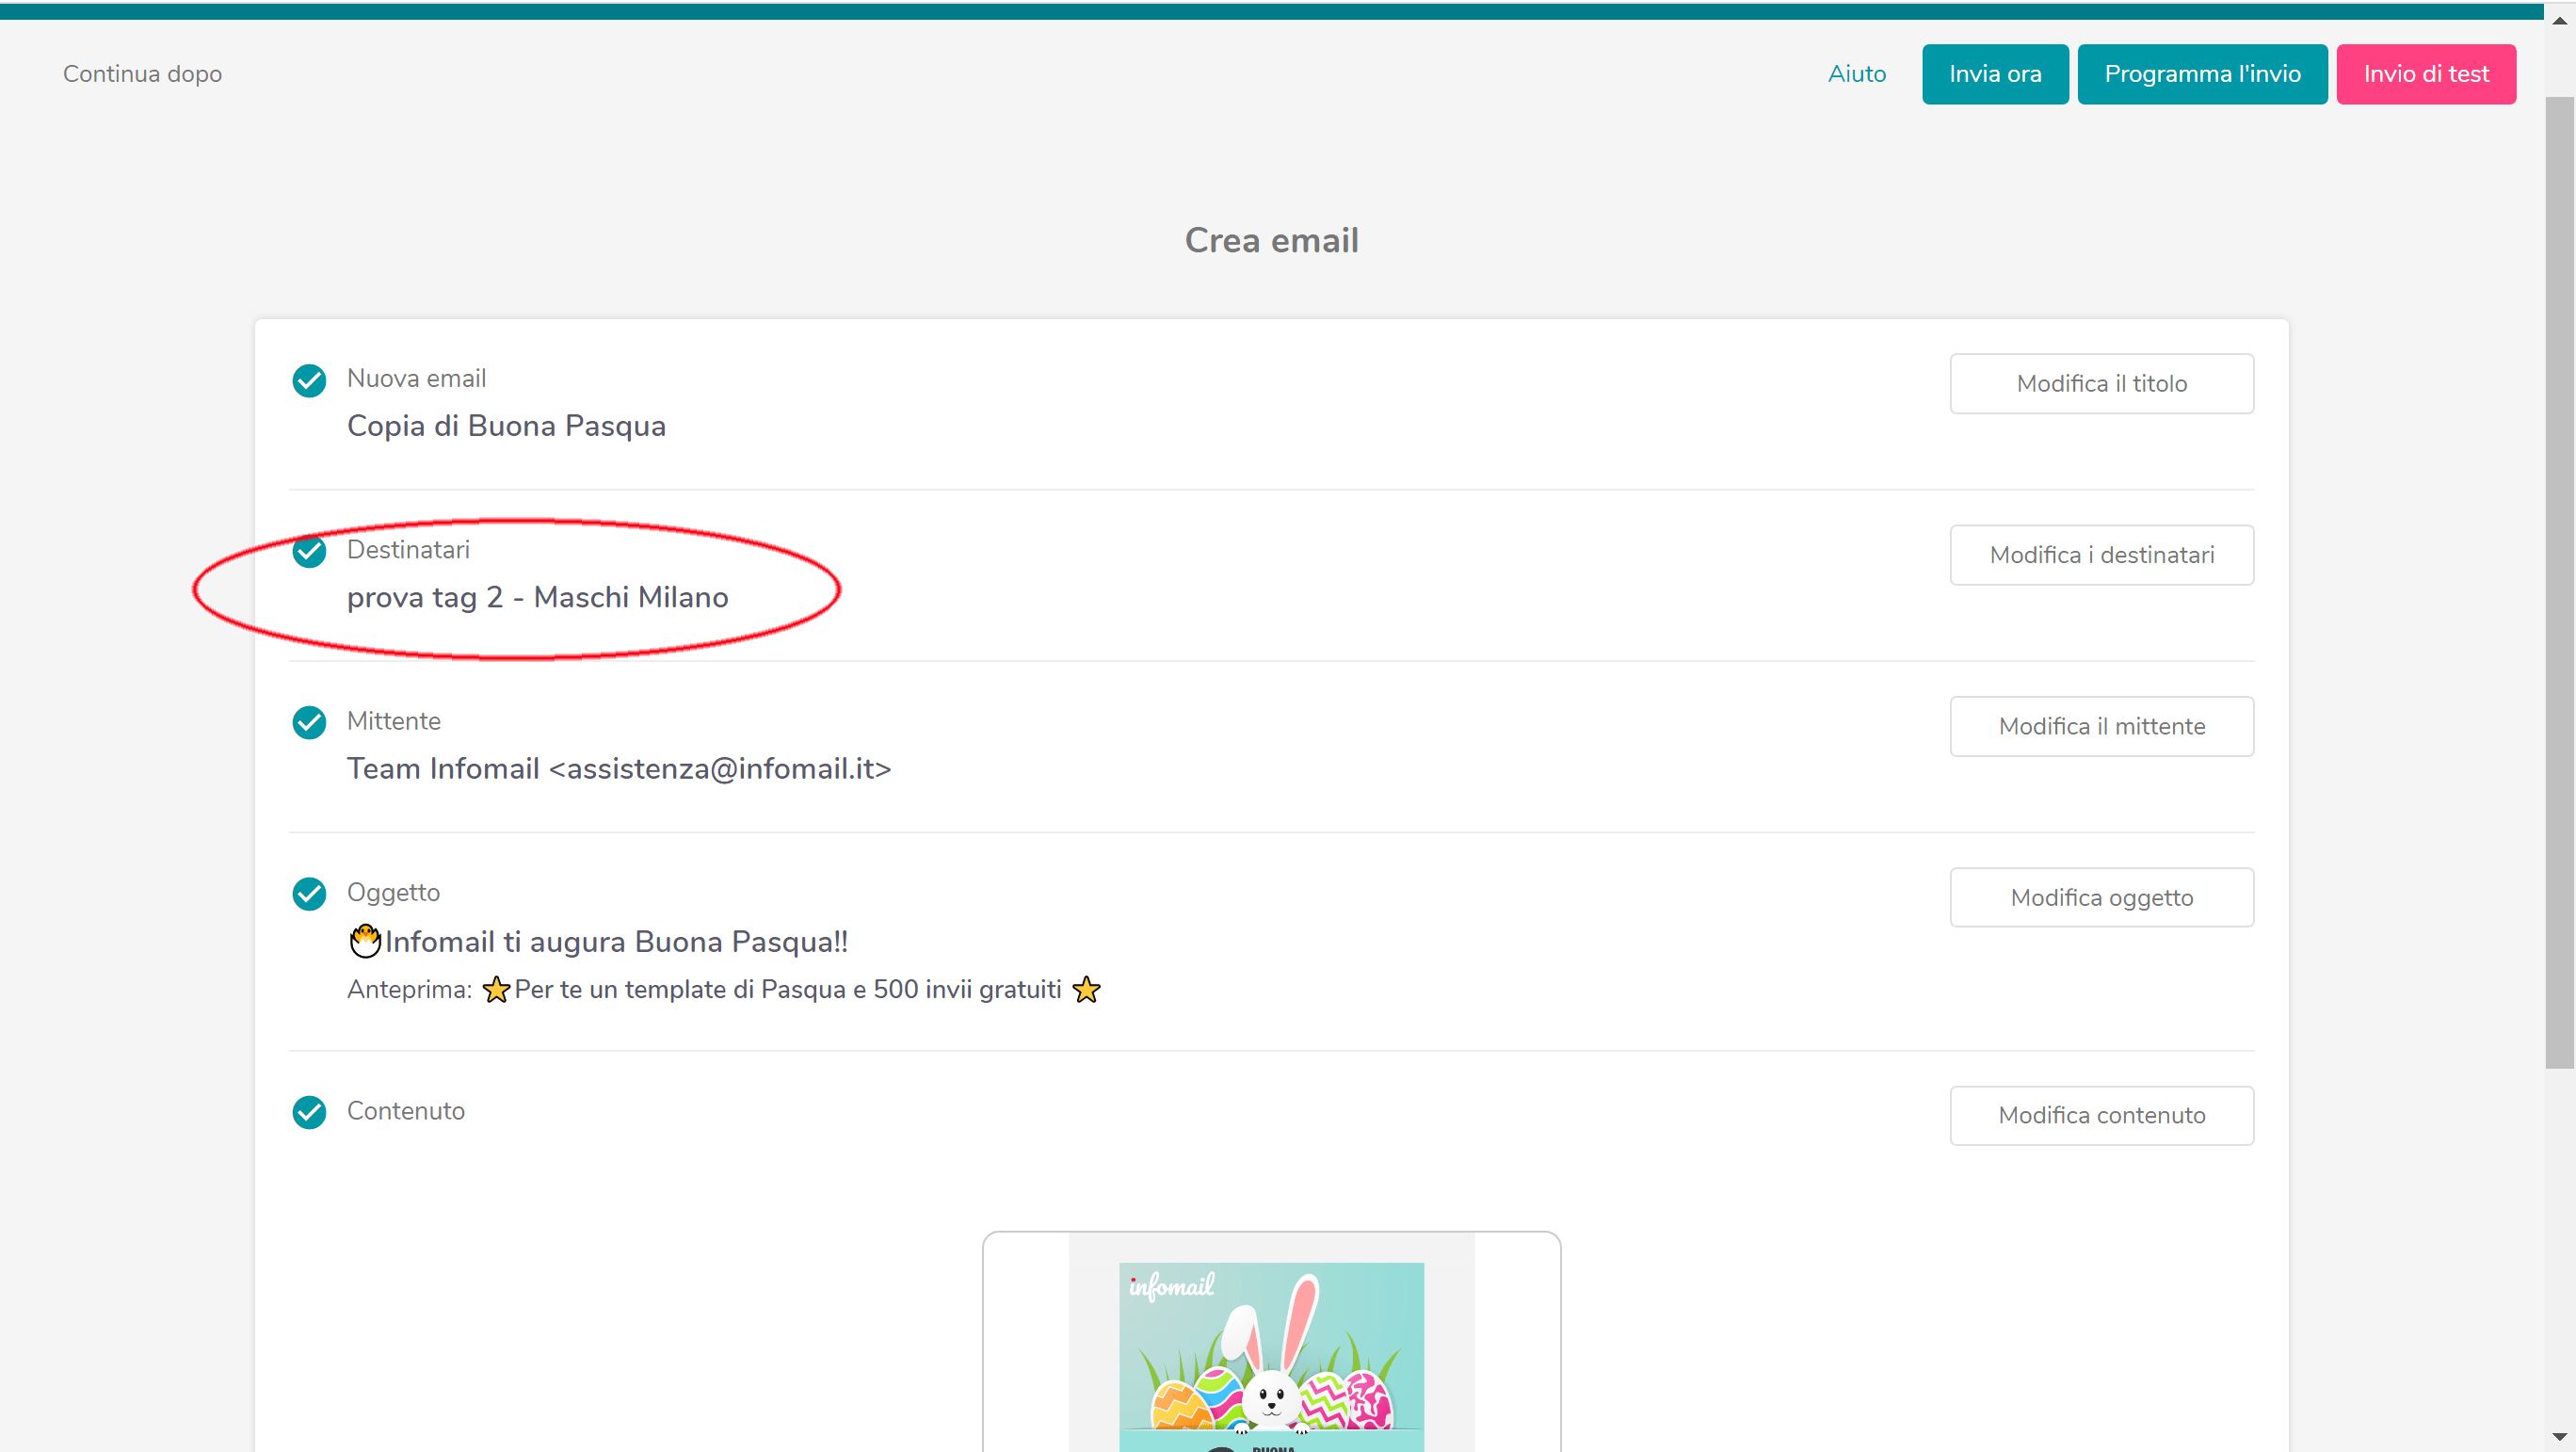
To send an email to a segmented list, simply prepare the communication in a template and when selecting the recipients, first choose the list from the “Recipients” menu (in our case the “prova tag 2” list) and then the segment we created ad hoc ad hoc from the “Create Segment” menu (in our case, “Males Milan”).