Infomail’s drag and drop editor
Discover the most flexible and easy-to-use drag and drop editor
Infomail’s editor is a powerful and flexible tool that allows you to design and create your newsletters easily and quickly. To create a responsive newsletter, just follow a few simple steps: choose a template, select the blocks you want to insert, add your content (text, images, buttons) and customize the graphic settings. In just a few moments, your emails are ready to be sent. Infomail’s email editor is extremely flexible and able to support every creative need: create more effective and original emails, without any special skills.
Create your first email
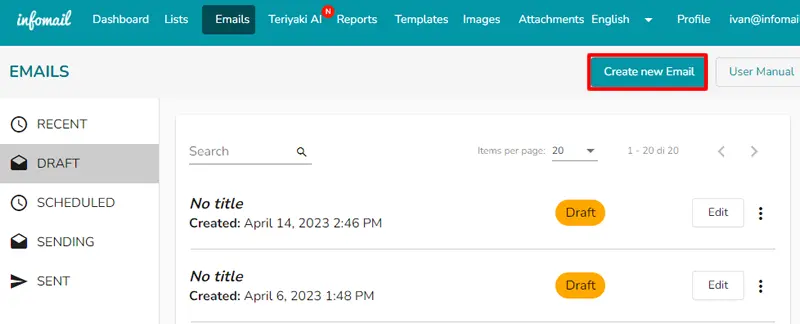
Go to the Email section in the top menu.
Fill in all the fields:
– Title (to remind you of this email, it is not displayed in the email)
Recipients , (choose the list to send to)
– Sender (choose the sender to use)
– Subject (choose the subject of the email; remember that it is one of the main elements that influence the opening)
– Content (relates to the actual content of the email)
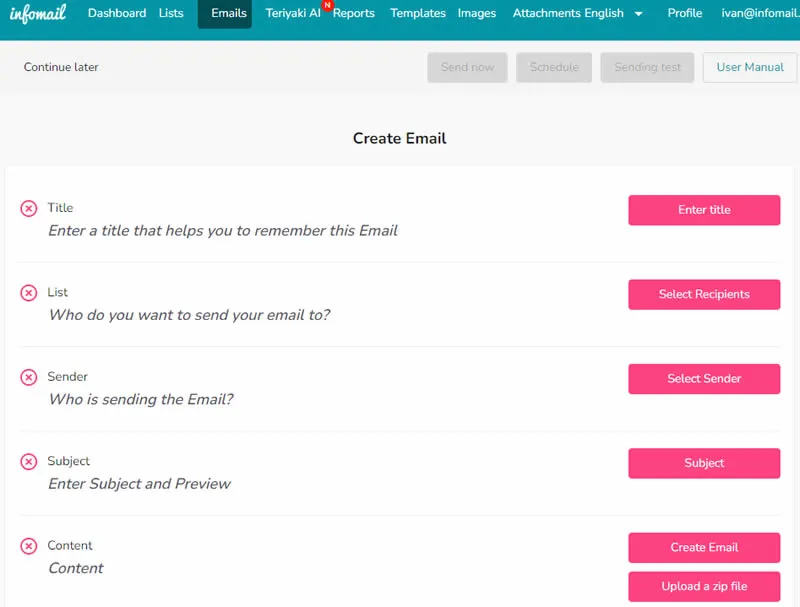
You can choose to use the Infomail drag and drop editor (by clicking on Create email) or upload your html file, compressed in .zip format.
If you upload the html file, make sure to include the unsubscribe code provided by Infomail {{UnsubscribeURL}}.
If you decide to create the newsletter with drag and drop, click on Create email.
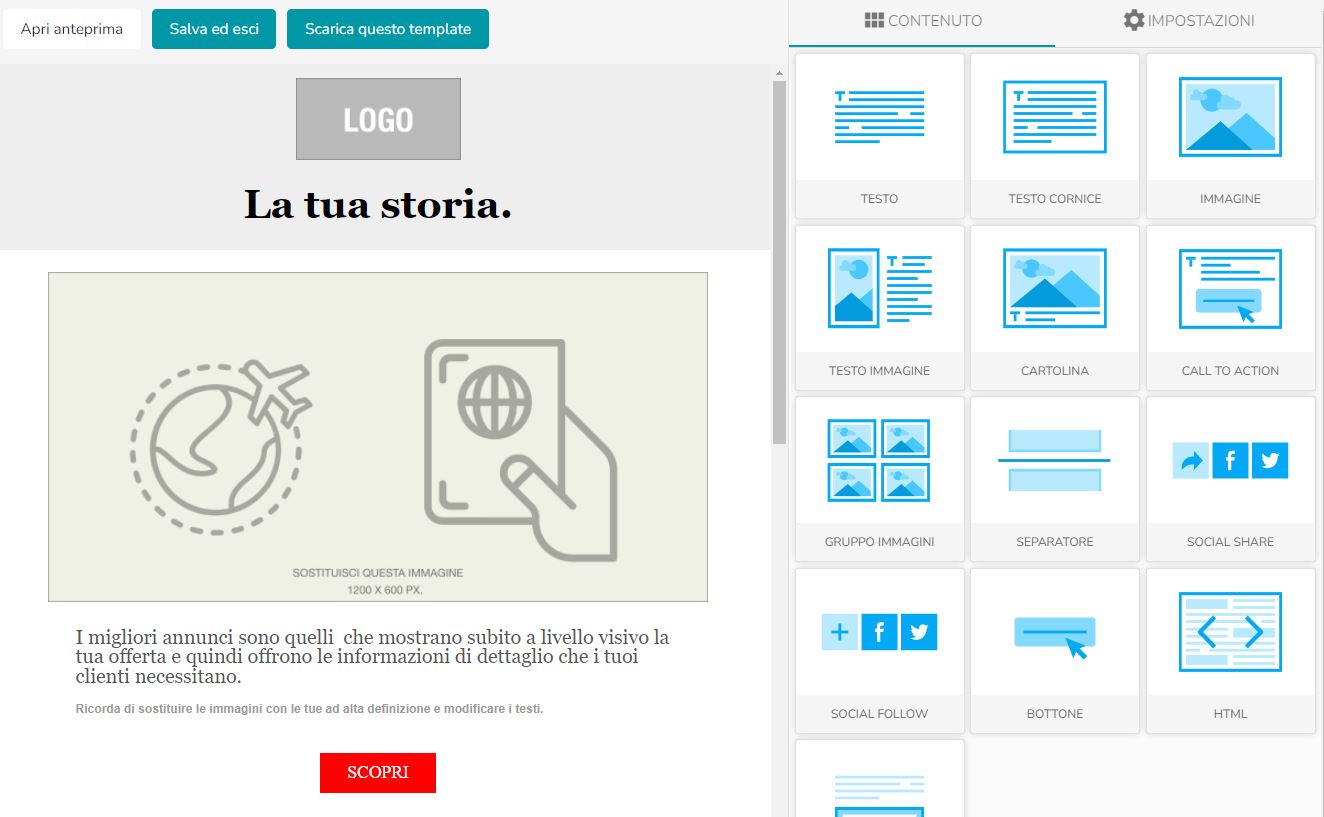
When you open the editor, you can see the preview of the blocks on the left side; on the right, you can see all the types of blocks available:
- text (a block that you will use to write only text)
- text frame (identical to the previous one but already pre-formatted)
- Image (a block for the insertion of images only)
- Text image (a block for mixed text and image insertion: you can choose to position the text below, above, to the left or right of the image)
- Postcard (a block with an image above and text below)
- Call to action (a block that allows you to insert an image + text + button; ideal for products, you can insert up to 3 products per row)
- Image group (a block for multiple image insertion; you can upload up to 5)
- Separator (a block for inserting a separation line)
- Social share (a block that will allow your readers to share the newsletter on social media)
- Social follow (a block that will allow your readers to go to your social page)
- Button (a block with which you can create and customize the button)
- HTML (if you need to insert particular elements not provided by default, you can use the HTML block; in this case, make sure that the codes you have entered respect the responsiveness of the newsletter)
- Footer (the footer automatically contains the code for unsubscribing from the newsletter)
Configuring a block
To add a block to your newsletter, move your mouse to the right and choose the one you are interested in.
Click and drag it to the left, then release it where you want to insert it.
To edit the block, click on it.
The text image block will be highlighted with a blue outline.
You will see that the right side has become a editable section.
This is an example of a text-image block.
You can insert the image by clicking on “Insert image”; you can insert the alt text in “Accessible text” and insert the link of the image.
Remember to include “https://” in all links.
At the bottom right, you can edit the text. Remember to save after making changes by clicking on the “Save and close” button at the bottom right of the block.
By clicking on the block on the left, you can move it up or down, duplicate it, or delete it.
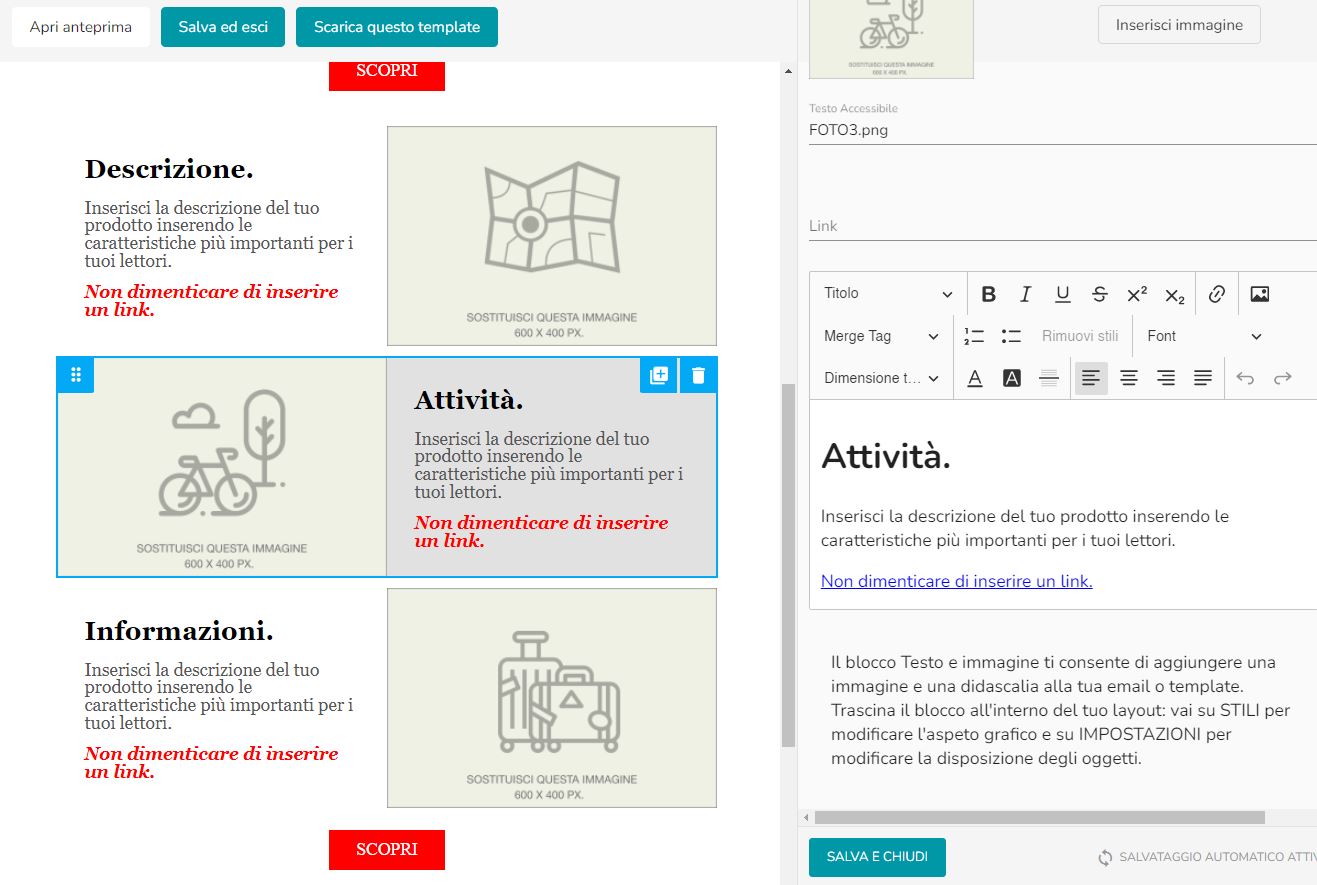
You can customize the block in different ways.
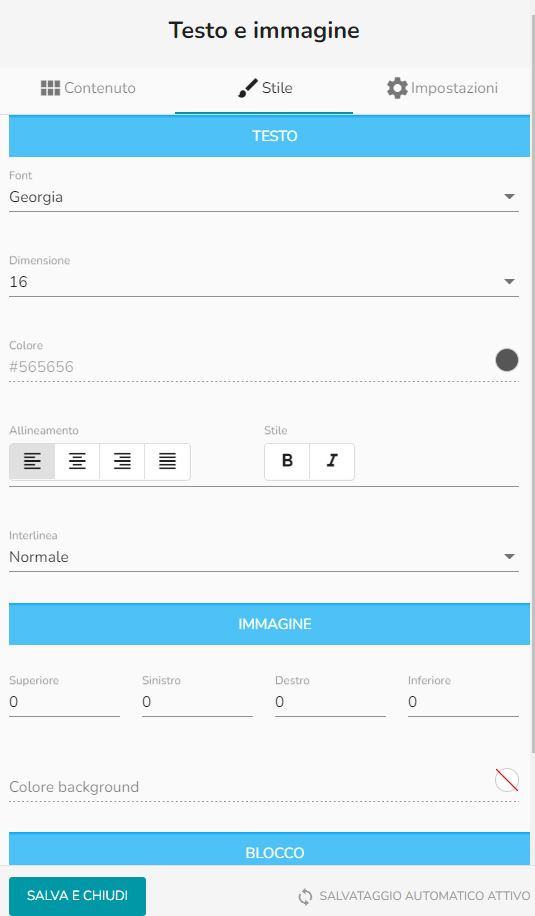
By clicking on the “Style” section at the top of the block, you can decide on colors, fonts, text formatting, image formatting, and block formatting.
However, you can also modify the text style from the “Content” section.
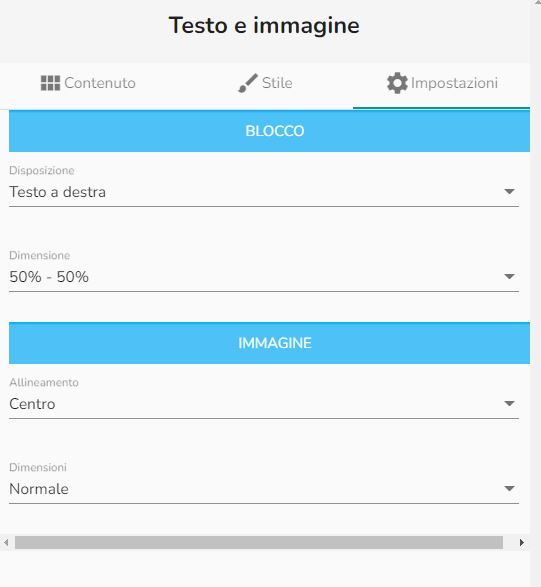
By clicking on “Settings” at the top, you will find some characteristics related to the structure of the block that you can modify:
You can choose the position of the text relative to the image, the proportions between the text and the image, the alignment of the image, and the dimensions, which we recommend setting to “Normal.”
Save and close after making changes.
Once you have finished the graphical part, remember to click on “Save and exit” at the top left.
Customize your email with dynamic fields.
One of the best strategies to increase email open and click rates is to insert at least one personal reference of the recipient, such as the name or surname. Infomail allows you to insert one or more merge tags, which are placeholders that allow you to extract a specific field from contact lists and import it into the email. At the time of sending, the Merge Tag will be replaced by the data associated with each contact. Thanks to this feature, it is possible to build highly personalized emails tailored to the recipient’s expectations.
Crop and adjust images with the integrated editor.
Infomail provides you with unlimited Cloud space where you can upload all the images you need for your emails. Infomail also offers a powerful and useful tool that allows you to directly intervene on your images, such as resizing or cropping, without having to resort to complicated external applications.
Check the preview of your emails on different devices.
With Infomail, you can immediately check how your email will be displayed on different devices, smartphones, tablets, and desktops.
Attach PDFs and other documents with one click.
Infomail provides a cloud folder where you can store PDF files that can be linked to your emails without having to insert them as attachments.
Access the library of downloadable templates.
Infomail provides you with numerous predefined templates that you can use for your communications. One of the peculiarities of Infomail’s templates is that they can also be downloaded locally. All Infomail templates are based on the MJML standard, which makes our emails natively responsive and therefore optimally viewable on all devices.